|
|
If you are reading these rules for the first time, ignore the text along the right hand side. These rules serve as a summary to help you quickly familiarize yourself with the game.
Show
→ summary only
→ detailed version only
→ both summary and detailed version

On Yucata the following deviations from the rules apply:
Virtual Revenue
-
Anytime you would have to use a resource 'immediately' it is instead allowed to use until end of scoring phase.
-
If you get a trade commodity and don't have a disc, you can also use it until the end of the scoring phase (not immediately as per RAW).
Disc Limit
-
Per the designer, the game will not allow spending a disc if you have only 2 remaining
Timing
-
Market discs are selected during the 'End of Round' phase, not the Scoring phase, to handle ties.
-
Rule deviation: Unused discs are cleared off at end of scoring phase, before end-of-round phase (to allow using discs for market placement and helpers).
Warehouse and Stable Helper (Advanced)
-
The goods or animals removed are allowed to be placed anywhere on the player's board. This includes new spots in the warehouse or stable, which aren't technically 'other areas on the tally sheet' (per RAW it would exclude the warehouse and stable).
In ¡No Siesta!, 1-4 players manage small farms around the Alpich pond near the village of Esporles on Majorca.
Players will expand their farms, bring goods to the market, and deliver goods.
¡No Siesta! is a game that encourages players to seize potential opportunities while taking risks.
To win, a player will need to make wise decisions how best to utilize the unpredictable results of each die roll,
while keeping in mind what the other players are working towards.
¡No Siesta! contains the following components:
- 9 dice
- 1 pad of player tally sheets
- 1 pad of score sheets
- 4 pencils
- 32 wooden disks (8 in each player color)
- 24 roof tiles
- 36 helper tiles (6 in each player color and 12 grey tiles)
- 1 "Siesta Track" board
- 1 "The Esporles Market" board
- 4 revenue boards (in the player colors)
- 1 start player "pig" meeple
- 1 sticker sheet for the dice
- this rulebook
The dice
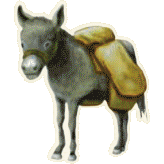
All 9 dice feature the same set of symbols: olive & grain, grapes, pig, donkey, hat, and silver.
From now on, the dice rolls are called revenue.
Player tally sheets and pencils
Players track their current game progress on the tally sheets using a pencil.
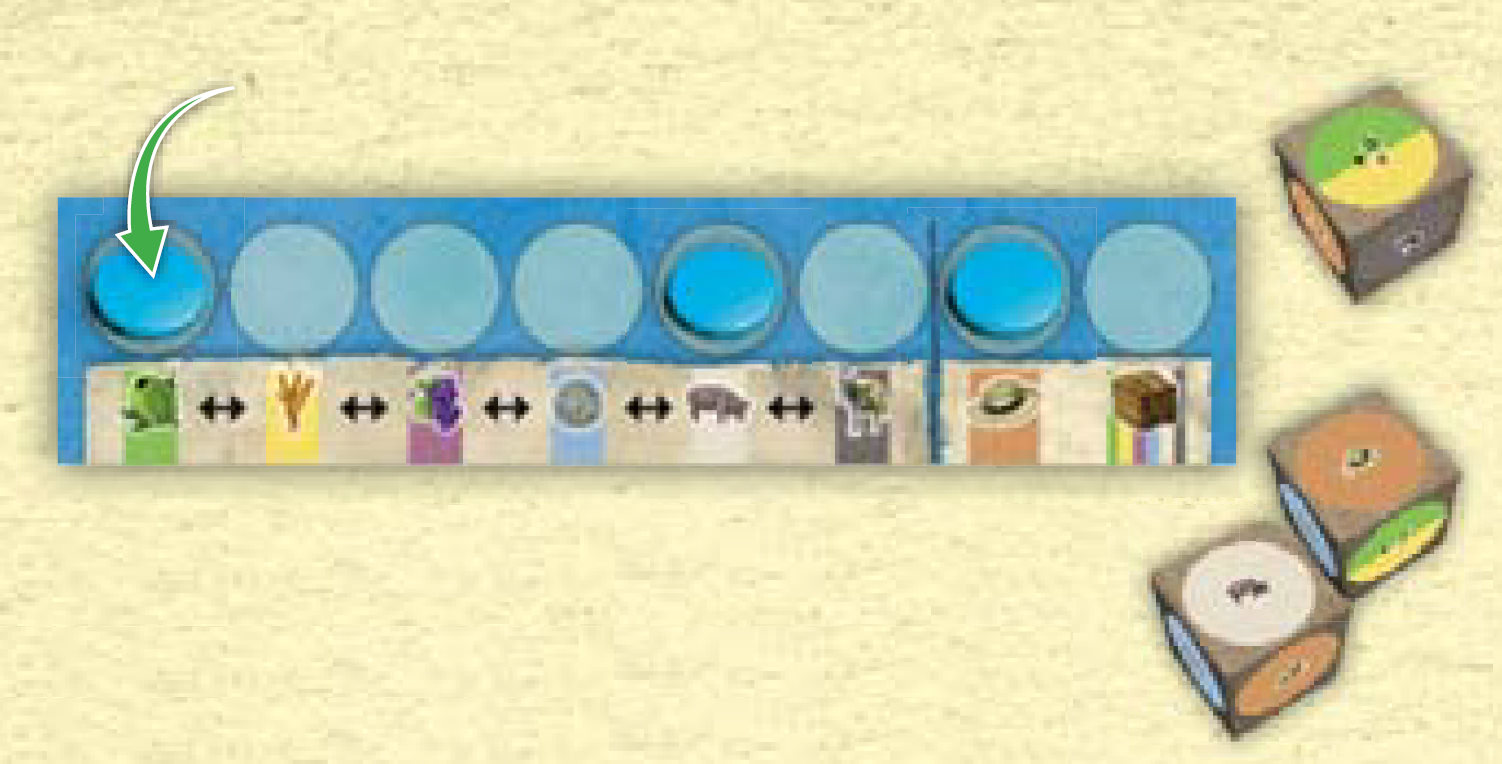
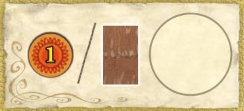
Player revenue boards and marker discs
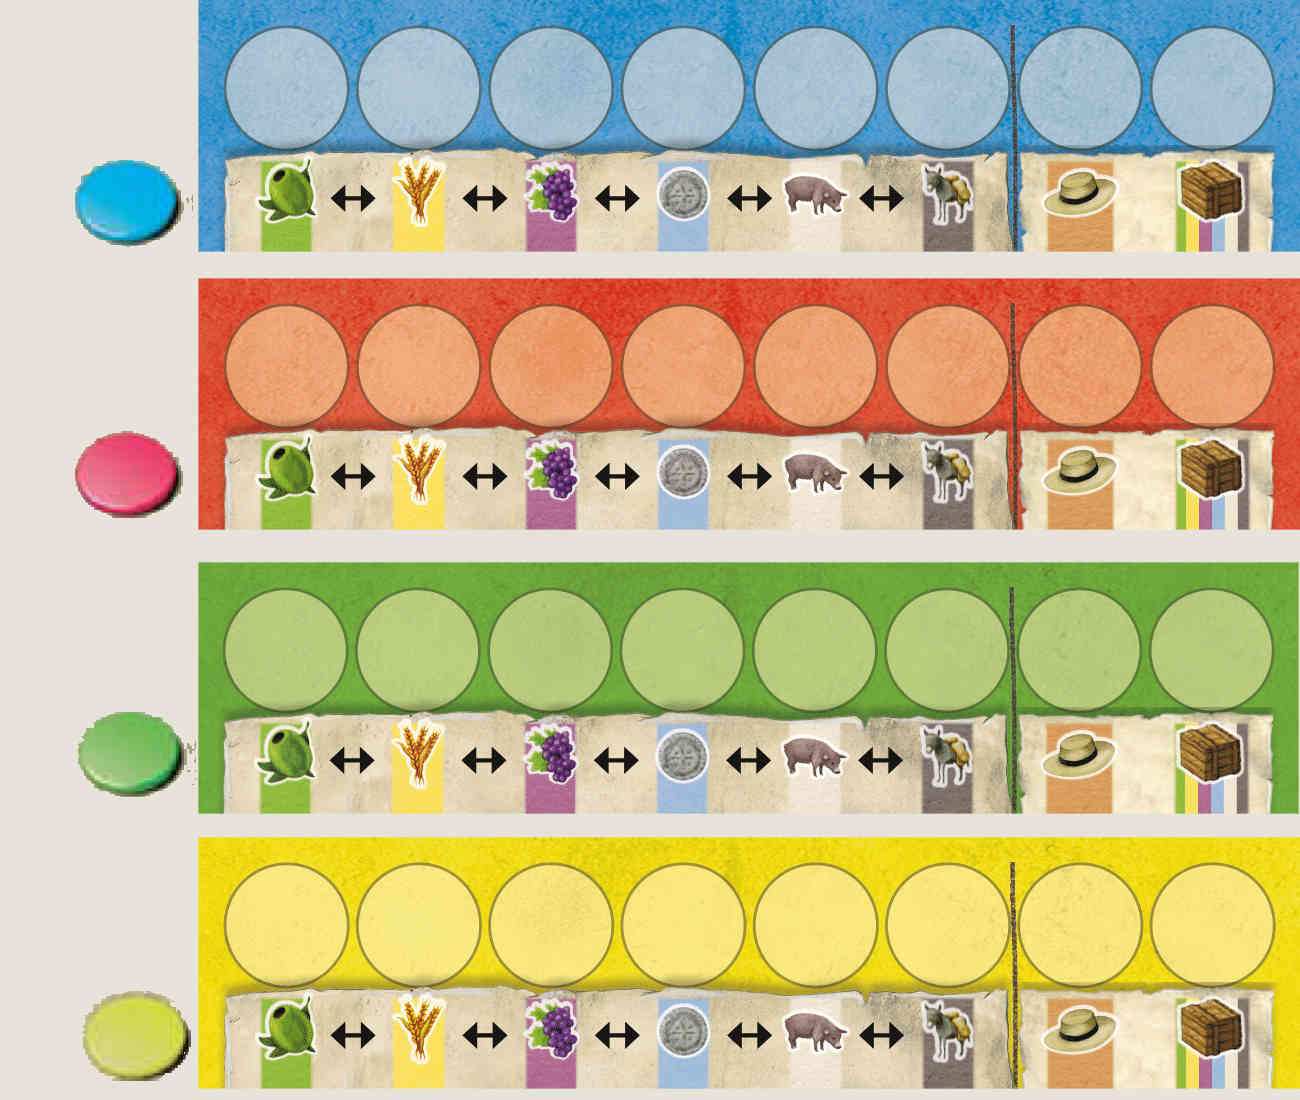
Players receive revenue from the dice. Players mark the revenue on their revenue board using their player discs.
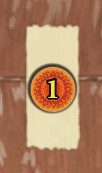
The roof tiles
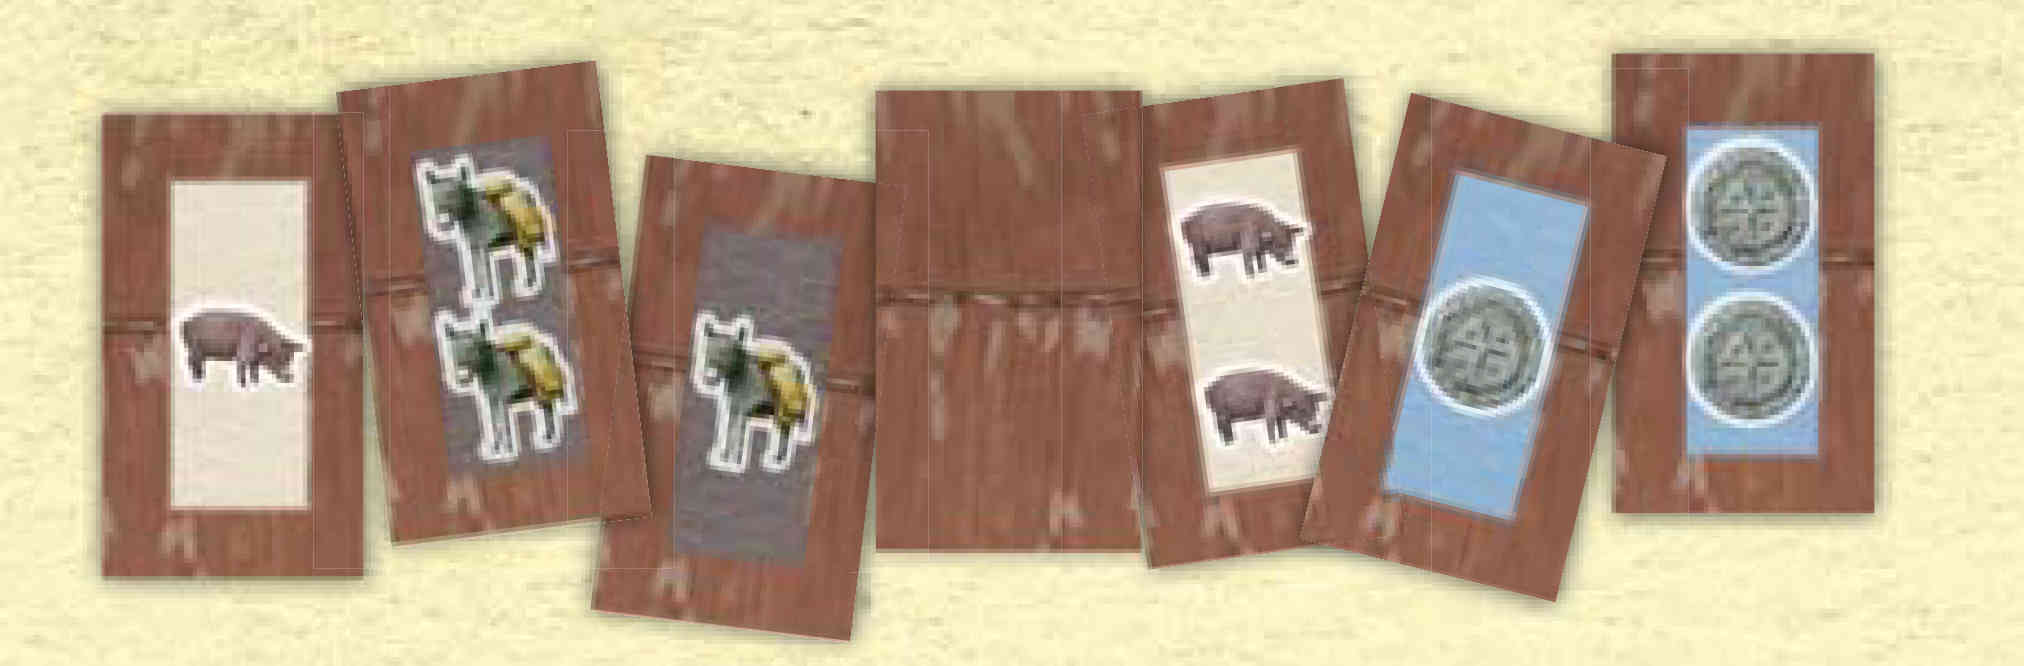
Players place roof tiles on the barns on their tally sheets. The roof tiles offer varying bonuses.
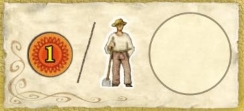
The helper tiles
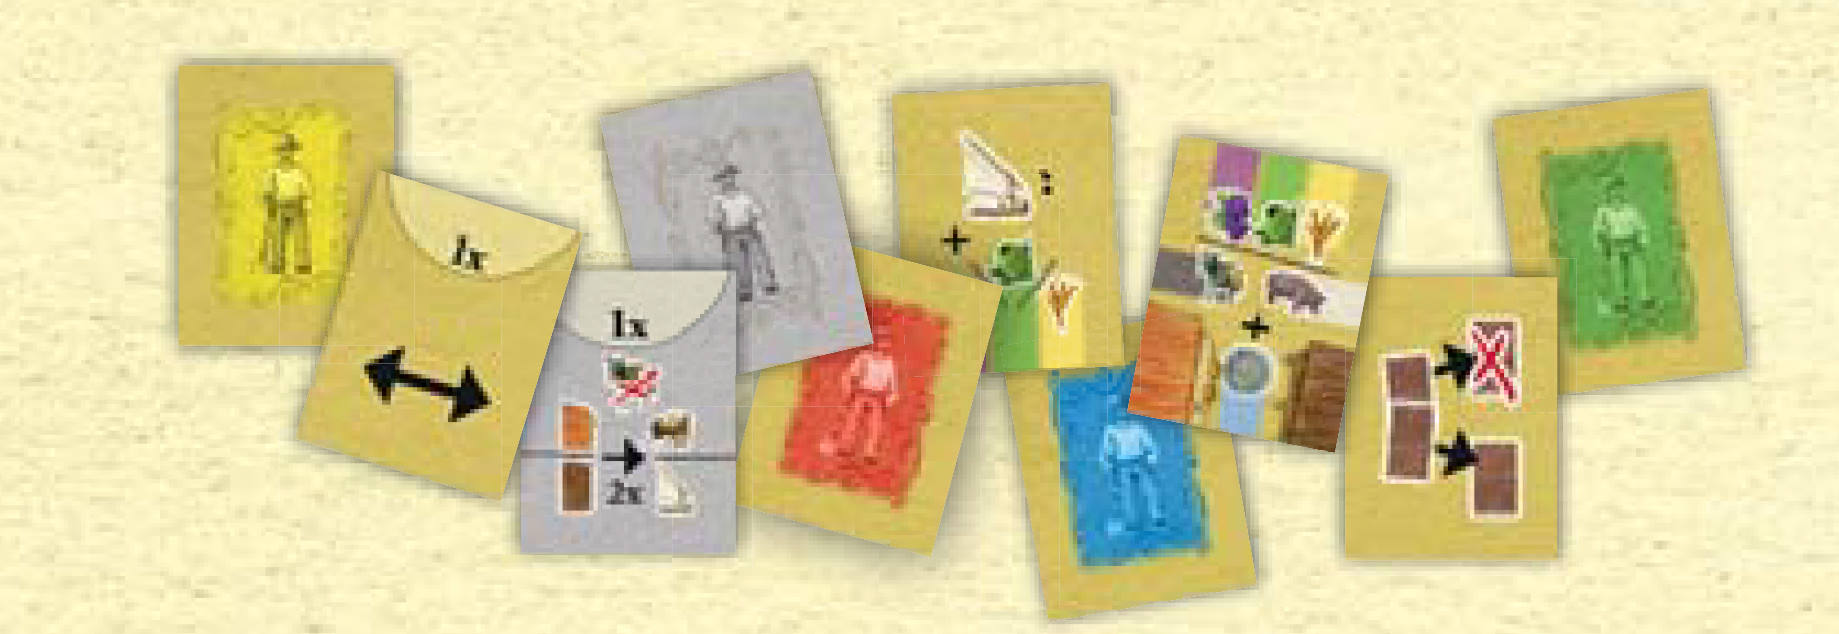
Players hire helpers that will bring the player benefits for the remainder of the game.
The Siesta Track board
Players advance their marker discs on the Siesta Track.
The Esporles Market board
Players mark locations on the Esporles Market board to obtain additional victory points at the end of the game.
The start player meeple
The start player gets the start player "pig" meeple.

Over several rounds players will deliver goods to both the local market and foreign markets earning victory points.
The player with the most victory points at the end of the game wins.
Throughout the game, players will expand their farms and deliver goods to both the local market and foreign markets
over several rounds, earning the players victory points.
To succeed, players will need to account for the actions available to their opponents,
adapt to the vagaries of the dice, and respond quickly to game situations.
The player with the most victory points at the end of the game is declared the winner.
-
Give each player the following: A revenue board and 8 discs of his color, a player tally sheet, a pencil, and the six helper tiles of the player’s color.
-
Each player keeps 4 discs. One disc from each player is placed on the first space on the Siesta Track. The rest are placed next to the Esporles Market board.
- The start player gets the "pig" meeple.
-
Select dice equal to 2n + 1, where n is the number of players.
- Place the Esporles Market board and the Siesta Track board with the 2-4 player side face up in the middle of the table.
-
Give each player the following:
- A revenue board and 8 discs of his color
- A player tally sheet which should be placed below their revenue board
- A pencil
- The six helper tiles of the player’s color placed face up adjacent to the tally sheet.
-
Each player keeps 4 of their discs in their stock. One disc from each player is placed on the first space on the Siesta Track. The remaining three discs for each player are placed in a common pool next to the Esporles Market board.
- Shuffle the roof tiles and place them face down in a stack next to the Esporles Market board.
- Randomly determine the start player and give that player the start player "pig" meeple.
-
Give the start player the appropriate number of dice using the chart below.
| 2 players |
5 dice |
| 3 players |
7 dice |
| 4 players |
9 dice |
-
Return any extra dice, player discs, player helper tiles, and player revenue boards to the box.
It is recommended that players play the first game or two without the 12 grey helper tiles -
return them to the box if playing a standard game. See 8 The Game for Experienced Farmers
if using the grey helper tiles.
¡No Siesta! is played over multiple rounds, each with three phases in the following order:
- Dice Phase
- Scoring Phase
- End of a Round
¡No Siesta! is played over multiple rounds. Each round, all players conduct three phases in the following order:
- Dice Phase
- Scoring Phase
- End of a Round
I - DICE PHASE
In the dice phase, players receive revenue which they record on their revenue board but do not mark it on their tally sheet.
The start player rolls all the dice.
Beginning with the start player and proceeding clockwise, each player selects one die and marks the revenue on the player revenue board with a player disc.
The start player then rerolls the remaining dice, and players again select a die.
Finally, the start player rerolls the remaining die. All players mark this revenue.
Players have 4 discs available and may gain more.
Revenues are Harvest Goods (Olive/Grain/Grape), Animals (Pig/Donkey), Hat and Silver.
A player may choose to forgo a revenue (even if he owns enough discs).
2 Player Variant: "The Original La Granja"
The start player rolls the dice only once at the beginning of the dice phase. The two players select their dice as described above.
In the dice phase, players receive revenue which they record on their revenue board.
Do not mark this revenue on the tally sheet at this time.
This happens only in the subsequent scoring phase.
The start player rolls all the dice and places them in the center of the playing area.
Beginning with the start player and proceeding clockwise, each player selects one die,
placing it next to the appropriate revenue above his revenue board.
Immediately mark the revenue on the player revenue board with a player disc.
Note: player discs on the revenue board may be stacked, so players can have more than one revenue of any type.
The start player then rerolls the remaining dice, and players again
take turns selecting one die and marking it on their player revenue board.
Finally, the start player rerolls the remaining die. All players mark this revenue on their respective revenue board.
Players have 4 discs available at the start of the game to mark revenue.
This number may change during the course of the game.
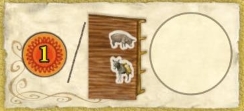
Revenues are distinguished as follows:
-
Harvest goods


-
Animals

-
Hat

-
Silver

If a player chooses a die with olive and grain, he may place a disc on both harvest goods on his revenue board.
A player may choose to forgo a revenue (even if he owns enough discs), but this choice
must be made at the time he chooses a die - players may not retroactively mark revenue on their revenue board.
If a player has insufficient discs to mark a revenue, he must forgo a part or all of the revenue.
Example: Marion has taken two dice and has accordingly marked a pig and a hat on her revenue board.
She only has a single disc left for the third die.
The cube shows olive & grain, so she must now choose between olive and grain.
II - SCORING PHASE
In the scoring phase, players record their revenue on their tally sheets.
Beginning with the start player, players conduct the scoring phase in turn order.
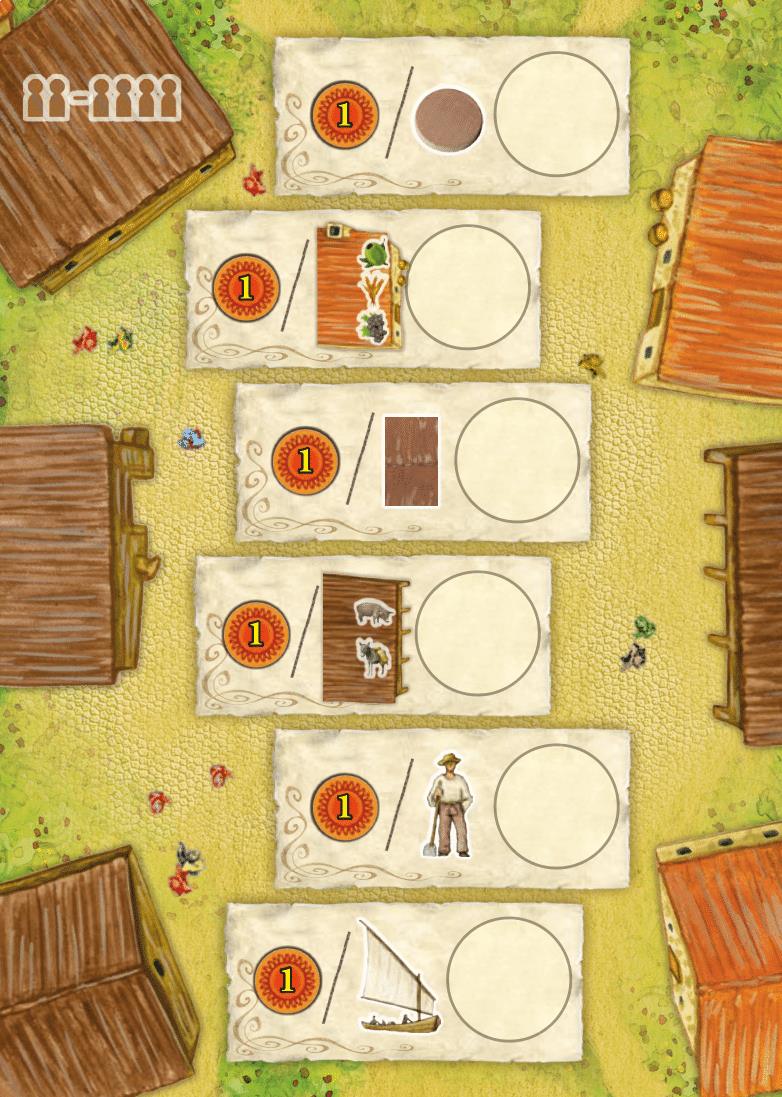
A player may mark the following areas on his tally sheet. Hats may also be used on the Siesta Track.
- Barn Roof
- Helper
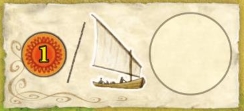
- Long-Distance Trade
- Carts
- Warehouse & Stable
- Siesta Track Board
In the scoring phase, players record their revenue on their tally sheets to advance in different areas to obtain victory points and special abilities.
Beginning with the start player, players conduct the scoring phase in turn order.
The tally sheet and the Siesta Track board contain six different areas, each following its own requirements for advancing.
A player may choose which area to apply each revenue received during the dice phase.
He may mark all revenue in a single area or distribute it among different areas, as long as he adheres to the special rules for each area.
After a player marks a revenue on his tally sheet, he removes the corresponding disc from his revenue board and returns it to his stock.
This disc is available for immediate use.
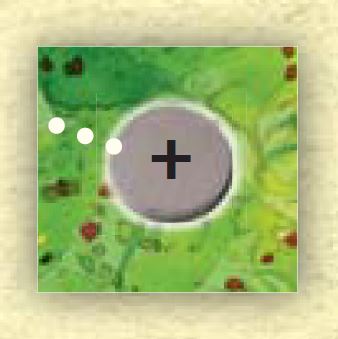
 Commodities: When a player completes certain areas on his tally sheet, the player receives commodities as a bonus.
Whenever he obtains a commodity in this way, a player places a disc from his pool on the commodity area of his revenue board.
A player may spend one or more commodities at any time during the scoring phase in order to mark any revenue type on his tally sheet with the exception of hats.
Commodities: When a player completes certain areas on his tally sheet, the player receives commodities as a bonus.
Whenever he obtains a commodity in this way, a player places a disc from his pool on the commodity area of his revenue board.
A player may spend one or more commodities at any time during the scoring phase in order to mark any revenue type on his tally sheet with the exception of hats.
A player may have multiple commodities during the scoring phase as long as he has enough discs in his pool.
If a player receives a commodity and has no disc left, he will either have to use the commodity immediately or forgo it.
A player may keep at most one commodity at the end of the scoring phase for use in the next round, returning the excess to his stock.
A player may mark the following areas on his tally sheet. Hats may also be used on the Siesta Track.
- Barn Roof
- Helper
- Long-Distance Trade
- Carts
- Warehouse & Stable
- Siesta Track Board
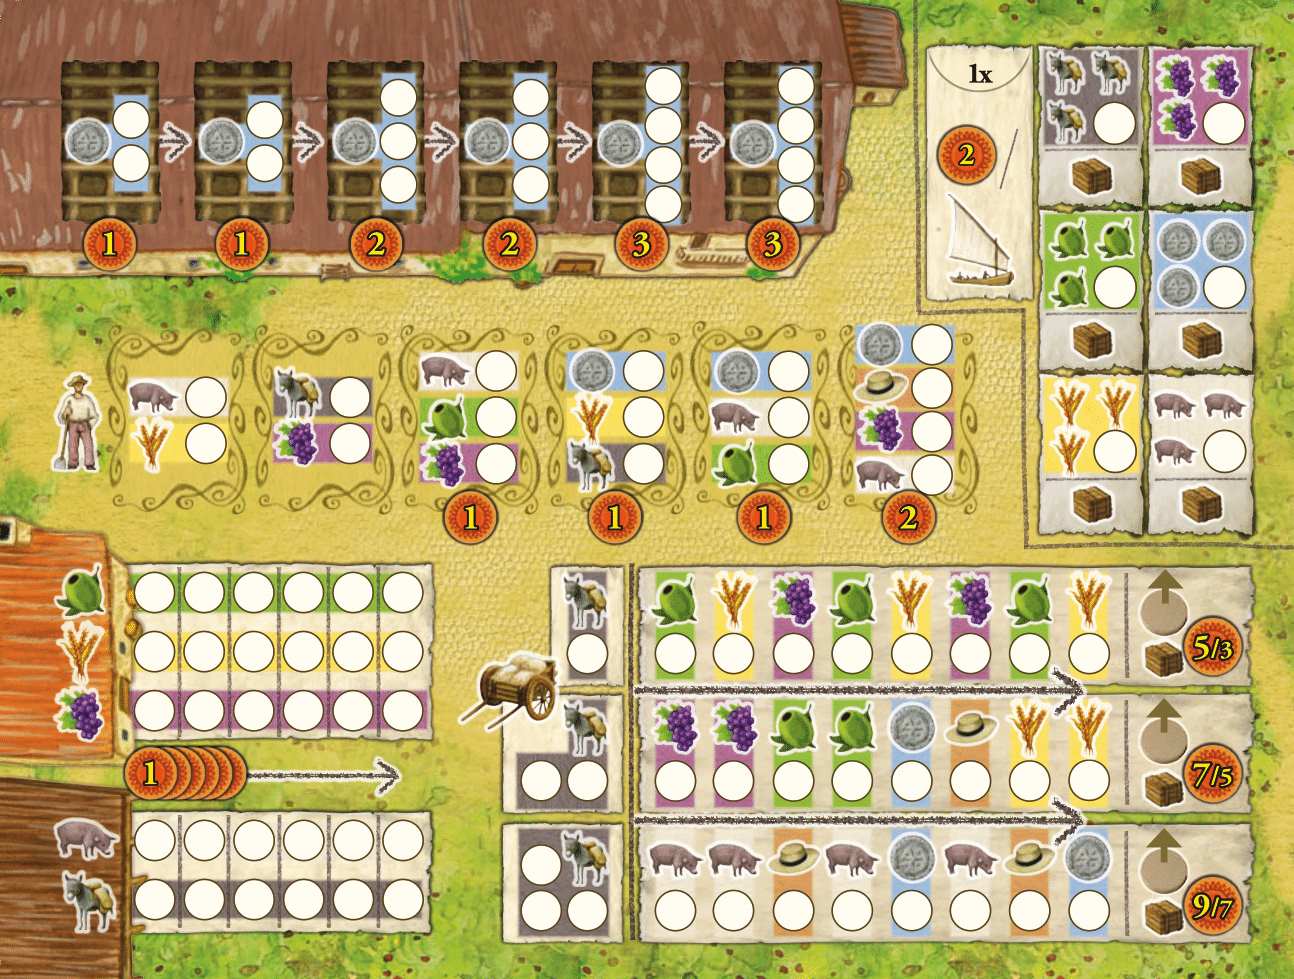
ABarn Roof
A player builds his barn roof from left to right with roof tiles.
The player needs a silver to cross off each circle in section.
Once a player crosses off all circles in a section, he draws a tile (face down) from the pool and places it face up on the section.
A player receives a one-time bonus for each roof tile and the victory points indicated below each covered section during end game scoring.
After a player chooses to use the one-time bonus awarded by a roof tile, he must flip it to the reverse side.
If the roof tile awards extra victory points, the player leaves it face up until the end of the game and includes these points during end game scoring.
The barn is located in the top left of the tally sheet.
A player builds his barn roof by covering the six sections with roof tiles.
The sections must be filled from left to right.
The player needs a silver to cross off each circle in section.
Once a player crosses off all circles in a section, he draws a tile (face down) from the pool and places it face up on the section.
A player receives a one-time bonus for each roof tile – see the glossary.
He will receive the victory points indicated below each covered section during end game scoring.
After a player chooses to use the one-time bonus awarded by a roof tile, he must flip it to the reverse side.
If the roof tile awards extra victory points, the player leaves it face up until the end of the game and includes these points during end game scoring.
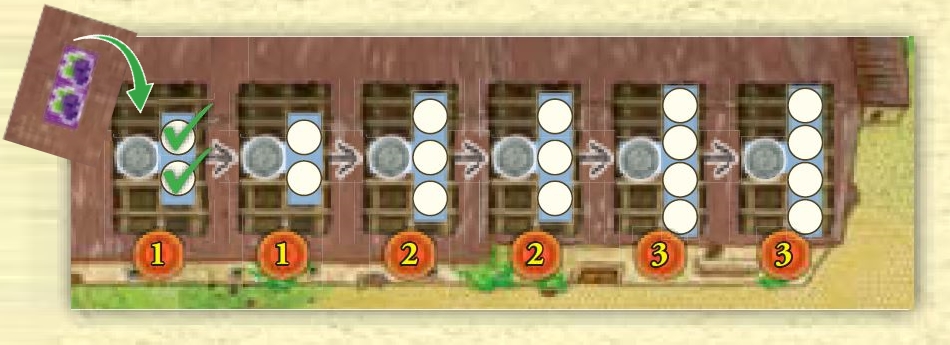 Example
: Marion has crossed off both circles in the first section of her barn and placed a roof tile accordingly.
She receives 2 grapes as a bonus, which she may use in a scoring phase.
BHelper
The Helper tile spaces are located below the barn.
Players may mark revenue circles on the tally sheet in this area in any order.
If a player has marked all the revenue circles within a helper space,
he hires a helper at the end of the game round, providing him permanent benefits in subsequent game rounds.
A player will receive the victory point(s) indicated below the four helper spaces to the right during end game scoring if they have hired that helper.
The Helper tile spaces are located below the barn.
Players may mark revenue circles on the tally sheet in this area in any order.
If a player has marked all the revenue circles within a helper space,
he hires a helper at the end of the game round, providing him permanent benefits in subsequent game rounds.
See the glossary for a description of each helper benefit.
A player will receive the victory point(s) indicated below the four helper spaces to the right during end game scoring if they have hired that helper.
 Example
: Marion has crossed off the three circles in the third space and hires a helper.
She places the helper on the space and may use his ability from the next round on.
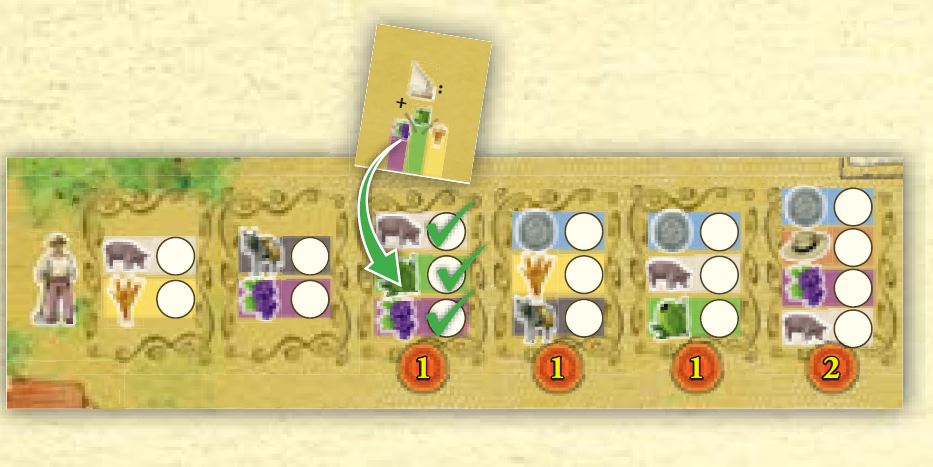
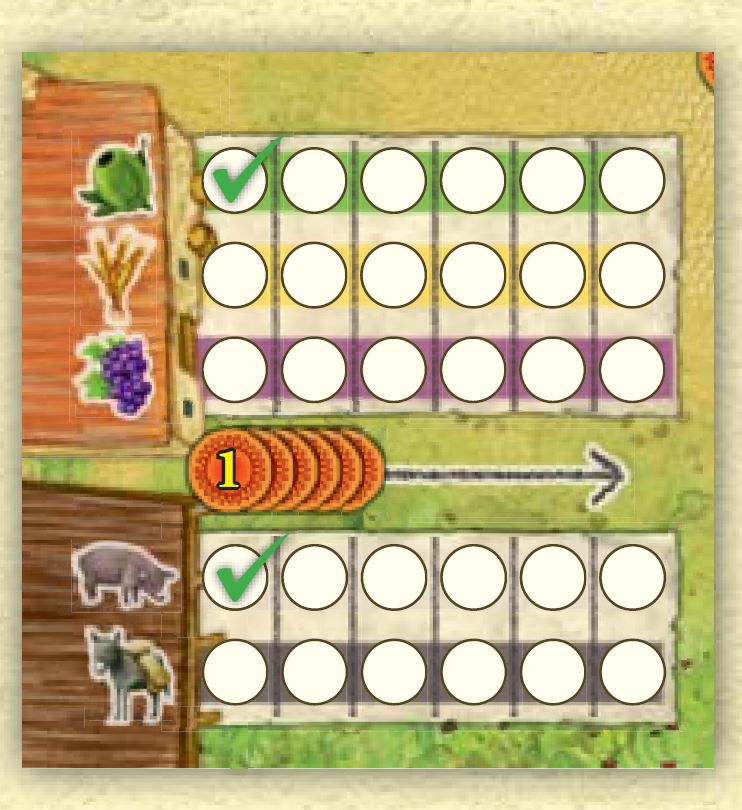
CLong-Distance Trade
The space for long-distance trade, where a player may prepare larger revenue deliveries, is located to the right of the barn and helper area.
Players may complete sections in this area on the tally sheet in any order,
but must be able to supply all three goods at once for the section order to mark off the revenue circle.
A player may only fulfill one long-distance trade in a scoring phase.
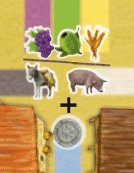
If a player has collected all three revenues in the same phase required for a space,
he marks the entire box and receives a commodity as a reward, which he marks on his revenue board with a disc.
The player receives 2 victory points for each completed long-distance delivery during end game scoring.
The space for long-distance trade, where a player may prepare larger revenue deliveries, is located to the right of the barn and helper area.
Players may complete sections in this area on the tally sheet in any order,
but must be able to supply all three goods at once for the section order to mark off the revenue circle.
A player may only fulfill one long-distance trade in a scoring phase.
If a player has collected all three revenues in the same phase required for a space,
he marks the entire box and receives a commodity as a reward, which he marks on his revenue board with a disc.
The player receives 2 victory points for each completed long-distance delivery during end game scoring.
 Example
: Marion has three olives and marks the appropriate long-distance trade space.
She receives a commodity and records this by placing a disc on her revenue board.
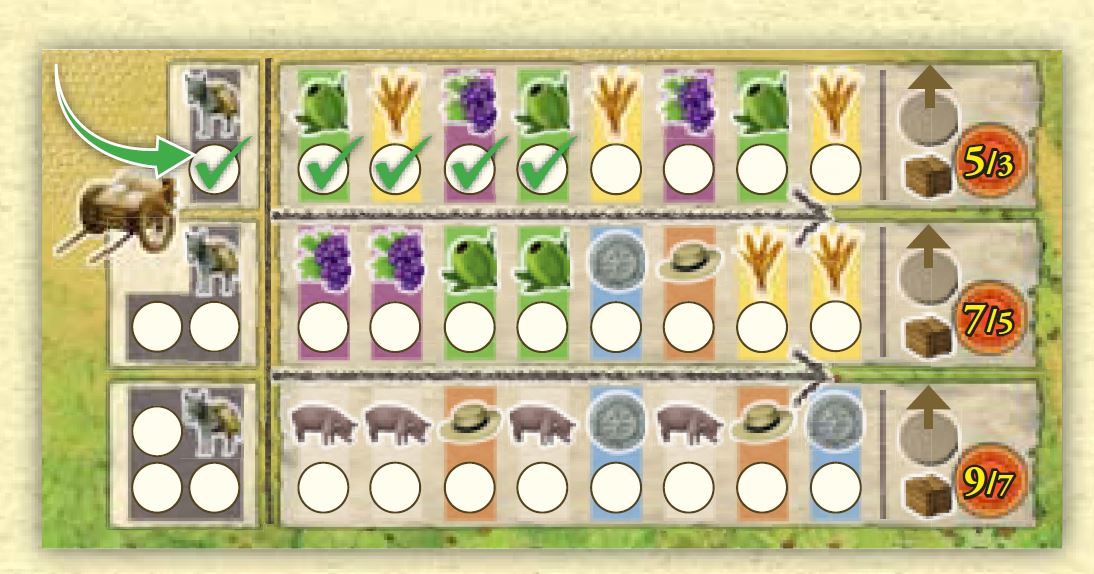
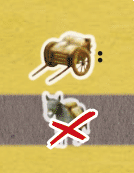
DCarts
The carts are located in the bottom right.
The carts display a combination of revenues the player must deliver for each cart.
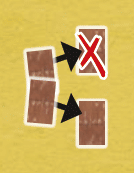
A player may serve all three carts, but must complete the revenues for each cart in order from left to right.
(The arrows between the carts are a reminder for the correct order of revenues.)
The player must also supply the required number of donkeys for a given cart to score the cart, and may supply them "in between" delivering the revenues.
The player may deliver revenues and supply donkeys for a cart over several turns, and does not have to do this in a single scoring phase.
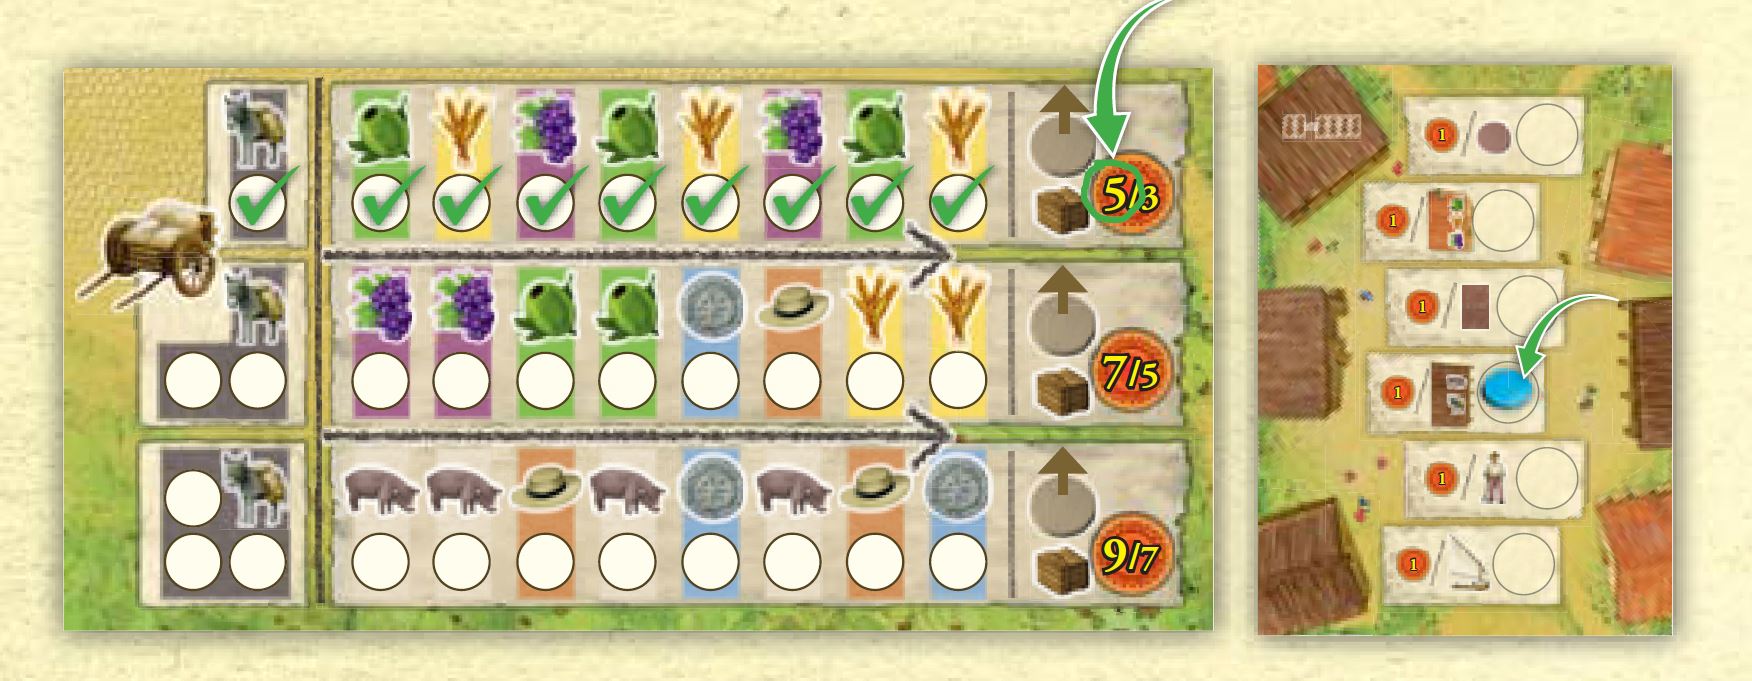
When a player fills a cart completely and hitches donkeys to it, he receives a commodity, which he marks on his revenue board.
He may now place a disc from his pool on the Esporles Market board.
This board shows six different bonus scores for the final tally.
The player places his disc in the box of his choice; he now has one less disc available for the remainder of the game and may no longer use this disk to mark revenue.
Each space on the market may hold a number of discs equaling the number of players minus one.
A player may place only one disc per box.
Example: In a 3-person game, only 2 players may choose the same space on the market.
The first player to complete a cart (including any donkeys) circles the larger victory point value to the right of the cart.
The other players cross off this number and receive the lower victory point value if they score the cart in a later scoring phase.
These victory points will be awarded during end game scoring.
In the rare case several players score the same cart during the same scoring phase,
the player who has advanced furthest on the Siesta Track receives the higher victory point value.
If players are also tied on the Siesta Track, those players will both receive the higher victory point value.
The carts are located in the bottom right.
The carts display a combination of revenues the player must deliver for each cart.
A player may serve all three carts, but must complete the revenues for each cart in order from left to right.
(The arrows between the carts are a reminder for the correct order of revenues.)
The player must also supply the required number of donkeys for a given cart to score the cart, and may supply them "in between" delivering the revenues.
The player may deliver revenues and supply donkeys for a cart over several turns, and does not have to do this in a single scoring phase.
 Example
: Marion has marked the first four revenues in the cart in prior turns.
This turn she marks one donkey in front of the cart.
Later she loads the other revenues onto the cart and scores the cart.
When a player fills a cart completely and hitches donkeys to it, he receives a commodity, which he marks on his revenue board.
He may now place a disc from his pool on the Esporles Market board.
This board shows six different bonus scores for the final tally.
The player places his disc in the box of his choice; he now has one less disc available for the remainder of the game and may no longer use this disk to mark revenue.
Each space on the market may hold a number of discs equaling the number of players minus one.
A player may place only one disc per box.
Example: In a 3-person game, only 2 players may choose the same space on the market.
The first player to complete a cart (including any donkeys) circles the larger victory point value to the right of the cart.
The other players cross off this number and receive the lower victory point value if they score the cart in a later scoring phase.
These victory points will be awarded during end game scoring.
In the rare case several players score the same cart during the same scoring phase,
the player who has advanced furthest on the Siesta Track receives the higher victory point value.
If players are also tied on the Siesta Track, those players will both receive the higher victory point value.
 Example
: Marion is the first to complete the upper market cart.
She scores the cart and marks the 5 victory points.
She then places one of her discs on a scoring space on the Esporles Market board.
All other players must cross off the 5 victory points – if they complete it later, they will only receive the lower value.
EWarehouse & Stable
The warehouse and stable is located in the bottom left.
The player marks all revenue that he could not or did not want to use for the other areas.
These revenue circles must be filled in from left to right.
Players will receive victory points for stored revenues during end game scoring.
The warehouse and stable is located in the bottom left.
The player marks all revenue that he could not or did not want to use for the other areas.
These revenue circles must be filled in from left to right.
Players will receive victory points for stored revenues during end game scoring.
Example: Marion is left with an olive and a pig that she cannot use.
She marks the relevant circles in the warehouse and stable in order to obtain some victory points during end game scoring.
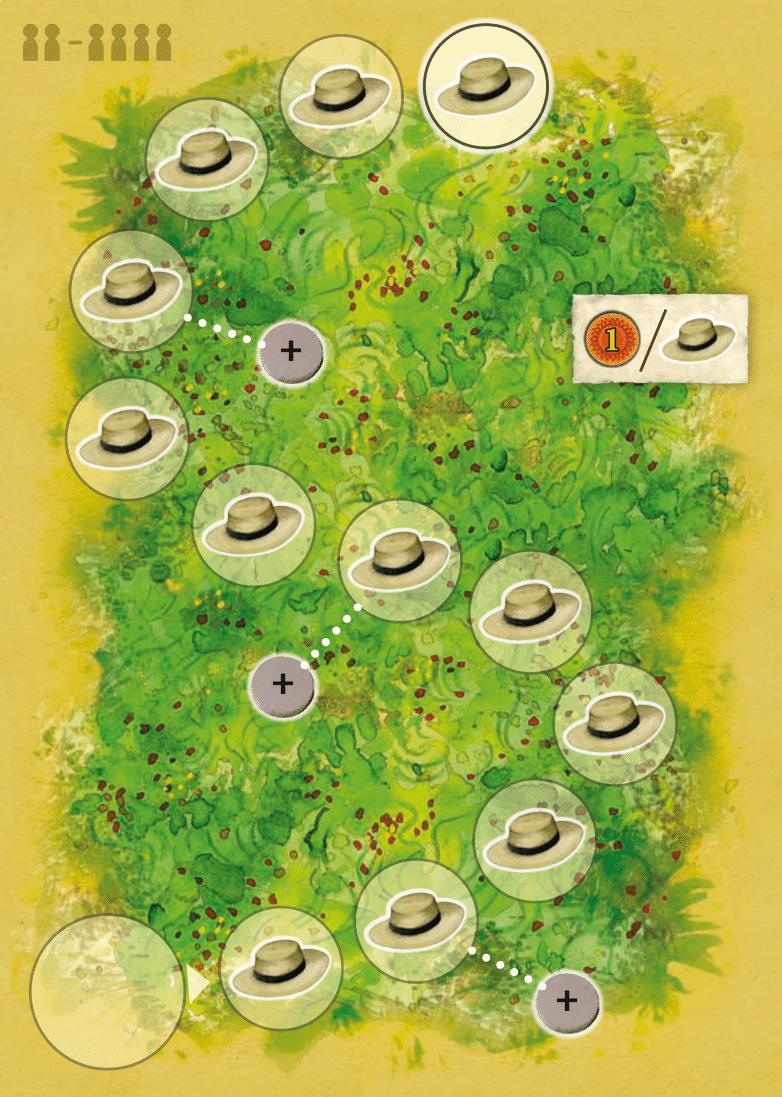
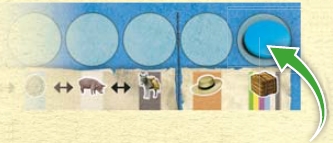
FSiesta Track Board
The Siesta Track board is located in the middle of the table.
A player advances his disc one space on the Siesta Track for every hat he uses from his revenue board.
 A disc icon is located next to several spaces on the track.
If a player reaches or advances beyond such a space, he receives a disc from the general pool and places it in his stock.
When a player reaches the final space of the Siesta Track,
the game will end at the end of the round (players still complete the current scoring and end of a round phases).
A disc icon is located next to several spaces on the track.
If a player reaches or advances beyond such a space, he receives a disc from the general pool and places it in his stock.
When a player reaches the final space of the Siesta Track,
the game will end at the end of the round (players still complete the current scoring and end of a round phases).
The Siesta Track board is located in the middle of the table.
A player advances his disc one space on the Siesta Track for every hat he uses from his revenue board.
A disc icon is located next to several spaces on the track.
If a player reaches or advances beyond such a space, he receives a disc from the general pool and places it in his stock.
When a player reaches the final space of the Siesta Track,
the game will end at the end of the round (players still complete the current scoring and end of a round phases).
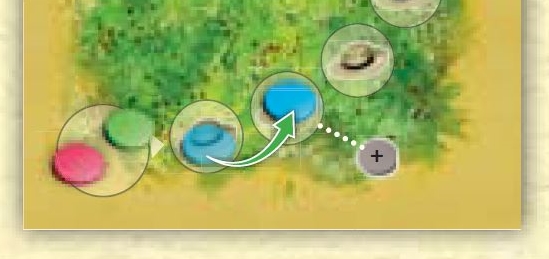 Example
: Marion advances her disc to the second space of the Siesta Track. She receives a disc from the general pool.
III - END OF A ROUND
Perform the following three steps:
-
Hire helpers: For completed helper spaces during the scoring phase now choose one of your helper tiles to
be placed on that space. Benefit of the new helper may be used for the remainder of the game.
-
Write off revenue: With the exception of one commodity remove any remaining revenues from the revenue board without compensation.
-
New start player: pass to the next player in clockwise direction.
Players then begin the next round.
If all players have completed the scoring phase, players perform the following three steps.
-
Hire helpers: If a player has completed a helper space during the scoring phase, he now chooses one of his helper tiles and places it on the recently completed space.
Beginning with the next round, he may use the benefit of the new helper for the remainder of the game - see the glossary.
-
Write off revenue: With the exception of one commodity, players may not store any revenue for later rounds on their revenue board.
Players must use all marked revenue either during the scoring phase or remove any remaining discs without compensation from the revenue board.
-
New start player: The current start player passes the start player "pig" meeple and the dice to the next player in clockwise direction.
Players then begin the next round.
 ¡No Siesta! ends the round in which a player reaches the last box on the Siesta Track.
Players now perform end game scoring as follows:
¡No Siesta! ends the round in which a player reaches the last box on the Siesta Track.
Players now perform end game scoring as follows:
- 1-3 victory points for each roof tile on the barn, plus any bonus points if applicable.
- 1-2 victory points for each helper tile on the four right spaces
- 2 victory points for each completed long-distance trade
- 1 victory point for each set of three unique harvest goods in the warehouse
- 1 victory point for each set of two unique animals in the stable.
- Victory points for completed carts
- 1 victory point for each space reached on the Siesta Track
- Victory points from the spaces on the Esporles Market board
The player with the most victory points wins ¡No siesta!.
In the event of a tie, the player furthest on the Siesta Track wins the tie.
If the players are also tied on the Siesta Track, another game must be played to determine the winner.
¡No Siesta! ends the round in which a player reaches the last box on the Siesta Track. Players now perform end game scoring.
Each player records his victory points on the score sheet as follows:
- 1-3 victory points for each roof tile on the barn, plus any bonus points if applicable.
- 1-2 victory points for each helper tile on the four right spaces
- 2 victory points for each completed long-distance trade
- 1 victory point for each set of three unique harvest goods in the warehouse
- 1 victory point for each set of two unique animals in the stable.
- Victory points for completed carts
- 1 victory point for each space reached on the Siesta Track
- Victory points from the spaces on the Esporles Market board
The player with the most victory points wins ¡No siesta!.
In the event of a tie, the player furthest on the Siesta Track wins the tie.
If the players are also tied on the Siesta Track, another game must be played to determine the winner.

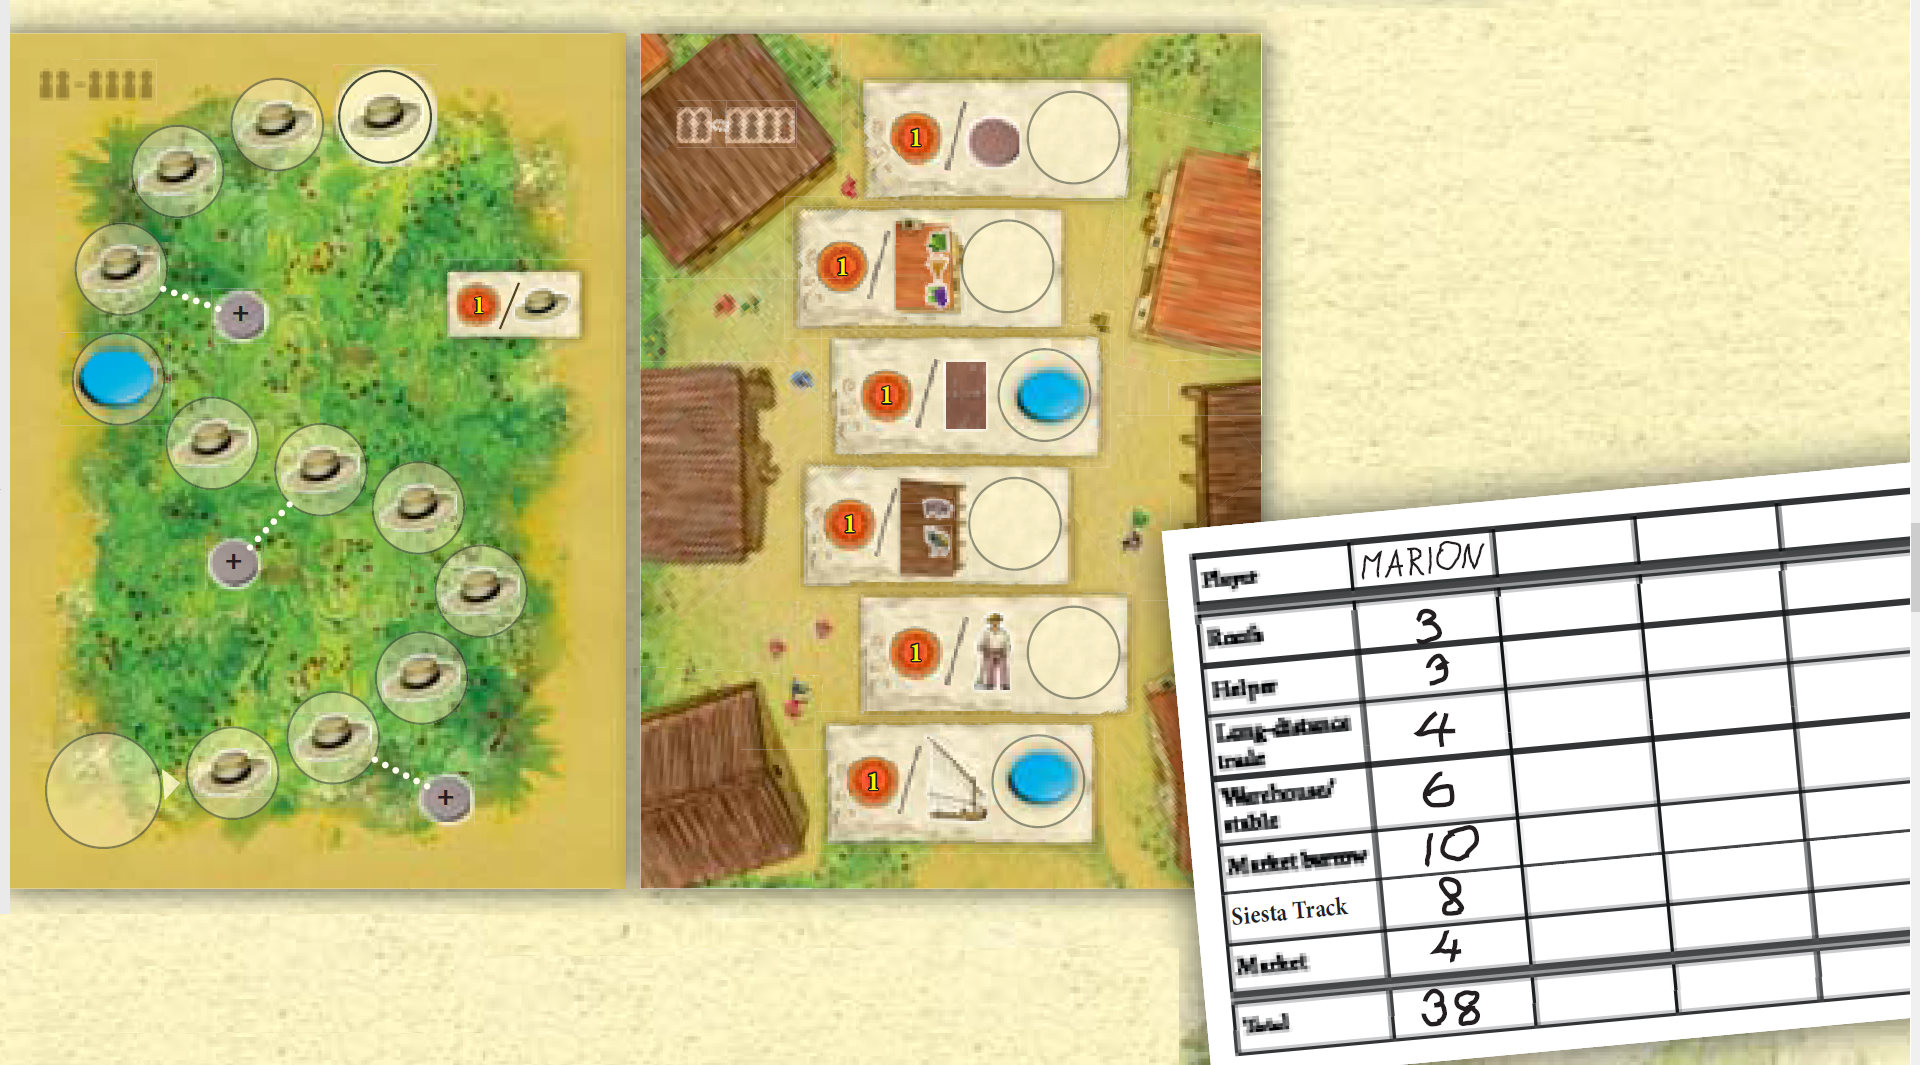 Example
: Marion records the victory points from the tally sheet, the Siesta Track, and the Esporles Market board.
She finishes the game with 38 victory points.
The following changes are recommended for experienced players to provide players with additional challenges and interaction. The standard rules apply with the following exceptions:
Set Up
Instead of players getting their own sets of helper tiles, place two sets of 6 helper tiles as well as the
12 gray helper tiles face up in the middle of the table for a 3 or 4 player game.
For a 2 player game, use only one set of 6 helper tiles and one set of 6 different gray helper tiles.
Players do not get their own sets of helper tiles.
Instead, they place two sets of 6 helper tiles as well as the 12 gray helper tiles face up in the middle of the table for a 3 or 4 player game.
This provides players a choice from a total of 24 tiles with 12 different skills.
For a 2 player game, players place one set of 6 helper tiles and one set of 6 different gray helper tiles face up in the middle of the table.
This provides players a choice from a total of 12 tiles with 12 different skills.
End of a game round
When a player takes a helper tile, he selects one from the middle of the table.
It is available for use at the beginning of the next round.
If several players may take a helper, they choose in the order of whomever is further along the Siesta Track. Tie breaker is turn order.
When a player takes a helper tile, he selects one from the middle of the table and places it on his scoring sheet.
It is available for use at the beginning of the next round.
If several players may take a helper, players choose helpers in order of whomever is further along the Siesta Track. Tie breaker is turn order.
Players may not take the same helper twice
The 12 gray helpers
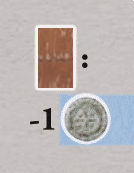 Roofing costs:
The player pays 1 less silver for a roof tile.
 Carts:
The player may ignore the revenue order for his carts.
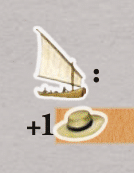 Long-distance trade:
The player receives a hat when he fulfills a long-distance trade.
This hat must be used during the same scoring phase the trade was completed.
It may not be marked with a disc on the revenue board.
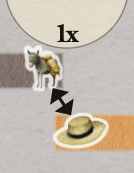 Siesta or work:
The player may use a donkey as a hat or a hat as a donkey once per scoring phase.
 Warehouse & stable:
The player may exchange a donkey from the revenue board
for the right to move two harvest goods from the warehouse or animals from the stable once per scoring phase.
The player circles the market circles on his tally sheet as a sign that he has removed the goods or animals.
He can now use them in other areas on his tally sheet, including helpers.
These spots are permanently lost to the player for the remainder of the game, and they are not used for any end game scoring.
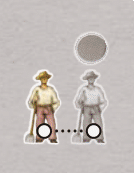 Helpers:
The player may copy another player’s helper (but not one he already owns).
The player places one of his discs on the copied helper and may use its ability beginning with the following round.
A player may not change the helper he has copied at a later time.
The disc remains on the other player’s helper until the end of the game.
The start player rolls the dice only once at the beginning of the dice phase.
The two players select their dice as described in the regular variant.
Roof tiles
The 24 roof tiles have different bonuses. A player may use any bonus once in a game and must then flip the roof tile.
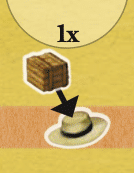
Bonus revenue:
A player takes the depicted revenue, which he may then use on the tally sheet during a scoring phase in any area(s).
The player does not mark this bonus revenue on his revenue board. He may combine them with revenue and use them as needed during the same turn.
Example: Marion has a roof tile with two grapes.
She uses the bonus to fulfill the long-distance trade for grapes along with a grape from her revenue board.
She then flips the roof tile. Later Marion obtains a roof tile with two pigs.
She uses it for the lower market cart and marks a pig, then a silver (taken from her revenue board), and then the second pig.
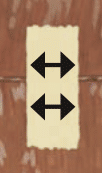 Change revenue:
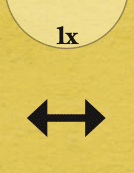
A player may either move two discs one space or one disc up to two spaces on his revenue board as long as the spaces are connected by arrows.
 Victory point:
A player earns 1 victory point during end game scoring.
Each player receives a set of 6 helper tiles.
A player may use the benefits of the hired helpers (during the respective phases) through the end of the game.
 Roof selection:
Each time the player draws a roof tile, he may draw two roof tiles and choose which one to keep.
He reshuffles the unchosen tile in with the remaining face-down roof tiles.
 Change revenue:
A player may move one disc one space on his revenue board each scoring phase as long as these spaces are connected with arrows.
A player may not obtain hats or commodities in this manner.
 Long-distance trade:
Each time a player fulfills a long-distance trade, he may choose one harvest good free of charge.
He must use it in the current scoring phase on the tally sheet and may not mark it with a disc on his revenue board.
 Warehouse & stable:
Each time a player has marked a combination of three different harvest goods in the warehouse or marked two different animals in the stable,
he earns 1 silver to be used during the current scoring phase on the tally sheet.
He may not use a disc to mark it on the revenue board.
The player can mark the revenues over several game turns and does not have to do this in a single scoring phase.
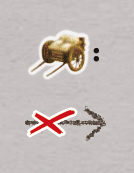
 Carts:
The player is no longer required to mark donkeys to complete a cart. The helper now pulls the carts to the market.
 Siesta:
The player may use a commodity as a hat once per scoring phase.
There are six scoring spaces on the Esporles Market board. If a player has a disc on a scoring space at the end of the game, he receives victory points as follows:
The player receives 1 victory point for each disc in his play area (but not for discs on the Esporles Market board or another player’s board).
The player receives 1 victory point for each set of three unique harvest goods in the warehouse.
The player receives 1 victory point for each roof tile on his barn.
The player receives 1 victory point for each set of two unique animals in the stable.
The player receives 1 victory point for each hired helper.
The player receives 1 victory point for each completed long-distance trade.
Virtual Revenue
-
Temporary goods from roof tiles, hat/donkey swap, trade commodity conversions, the Advanced Warehouse and stable Helper, etc are shown below the revenue board.
-
Anytime you would have to use a resource 'immediately' it is instead allowed to use until end of scoring phase.
-
If you get a trade commodity and don't have a disc, you can also use it until the end of the scoring phase (not immediately as per RAW).
Disc Limit
Per the designer, the game will not allow spending a disc if you have only 2 remaining:
-
The game auto-forfeits Esporles Market token placement if <= 2 discs.
-
The game will not allow selecting the advanced helper 'copy a helper' if <= 2 discs.
-
The game auto-forfeits helper selection if there are no legal helpers to take (only possible in advanced game, when player has <= 2 discs and all other helpers are taken).
Timing
-
Market discs are selected during the 'End of Round' phase, not the Scoring phase, to handle ties.
-
Rule deviation: Unused discs are cleared off at end of scoring phase, before end-of-round phase (to allow using discs for market placement and helpers).
Edge Cases
-
(Edge case) The game will not allow selecting the advanced helper 'copy a helper' if no there are legal helpers to copy.
Nomenclature
-
The spots that earn helpers are also referred to as Fields.
-
Long distance trade spots are also referred to as Ships.
Points
-
All points are calculated on the fly and shown directly instead of at the end of the game.
Points for the Market of Esporles are recalculated dynamically if necessary.
| |