Player mats
A player's mat shows the two unique powers the player has throughout the game.
Artifacts
Artifacts can be spent in place of any color material.
Artifacts can not be substituted for material when scoring
the "points for material" cultural achievement.
Nor can they be discarded in place
of material for the "discard pictured materials" cycle card goal.
Cultural achievement statues cost 3 artifacts.
At game end unused artifacts score 1 Confidence Point each.
There is a limit of 16 artifacts in the game.
Spent artifacts are returned to the supply.
Fuel
Fuel is used to modify die values. Each fuel spent changes the die value by
+/– 1, e.g. a "4" roll can be changed to a "3" or a "5" by spending one fuel, and
a "6" can be changed to a "4" or "8" by spending two fuel. You may not
modify a die to "0" or a negative value. The fuel supply is unlimited.
Cycle Cards
Three randomly selected cycle cards are used in each game, one for each cycle.
Each cycle card has a goal that earns Confidence Points for players who
fulfill it at the end of the cycle and a bonus that adds a special rule during
the cycle.
| Cycle One |
Cycle Two |
Cycle Three |
| Rounds 1-3 |
Rounds 4-6 |
Rounds 7-9 |
Cultural Achievements
There are two types of cultural achievements:
buildings and statues. All statues are available to be built
from the start of the game, but only the topmost building in the stack
of buildings is available to be built.
After the topmost building has been taken and built, the next
building is revealed and becomes available to be built.
Statues cost three artifacts.
Buildings cost the four materials shown on the building.
After purchasing a cultural achievement, take
it and the matching cultural achievement
tile. Immediately build the tile on an empty colony space that is not adjacent
to a colony center by spending the material matching the color of the colony space.
When you build a cultural achievement building, you take the shown bonus, if any, immediately.
Confidence Points for both types of achievements are scored at game end.
A player may never build more than TWO
cultural achievements during the game.
Player Mats
A player's mat stores materials, artifacts, fuel, and player dice. The player mat
also shows each player the two unique powers he has throughout the game.
Artifacts
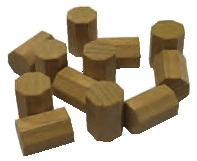
Artifacts can be spent in place of any color material, i.e., they act as a
"wild" material, but only for spending purposes.
Artifacts can not be substituted for material when scoring
the "points for material" cultural achievement.
Nor can they be discarded in place
of material for the "discard pictured materials" cycle card goal.
Artifacts are needed to pay the cost of cultural achievements statues.
At game end unused artifacts are worth 1 Confidence Point each.
There is a limit of 16 artifacts in the game.
A player can hold any number of them.
Spent artifacts are returned to the supply.
Fuel
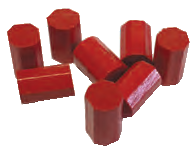
Fuel is used to modify die values. One fuel grants +/– 1 to a die
value. e.g. a "4" roll can be used as a "3" or a "5" using one fuel.
A "6" can be used as a "4" or "8" using two fuel. You may use as
many fuel on a die or during a turn as you are able. You may not
modify a die to "0" or a negative value. You may use fuel on any
action or movement. The fuel supply is unlimited.
Cycle Cards
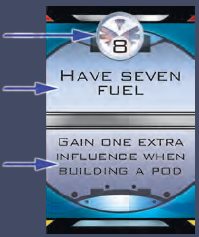
Confidence Points
Goal
Bonus
There are separate cycle cards for the first, second,
and third cycles in the game. Each cycle has three
cards and one of the three is randomly selected for
each game. This means out of the 9 cards, only three
will be used each game. Each cycle card has a goal
for the end of the cycle and a bonus that applies to
all players for the duration of the cycle.
The cycle bonus is activated at the beginning of
each cycle (rounds 1,4,7). The goal is scored at
the end of each cycle (rounds 3,6,9). Each player
who meets the requirement of the goal earns the
Confidence Points shown on the cycle card.
| Cycle One |
Cycle Two |
Cycle Three |
| Rounds 1-3 |
Rounds 4-6 |
Rounds 7-9 |
Cultural Achievements
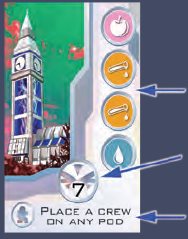
Cost
End of Game CP
Bonus
There are two types of cultural achievements:
buildings and statues. You purchase them at the Azophi
Nexus. After purchasing a cultural achievement, take
it and place it face-down next to your player mat.
You then take the matching cultural achievement
tile and immediately build it on an empty colony space
that is not adjacent to a colony center
by spending the material matching the color of the colony space.
You pay for buildings by spending the four materials
shown on the cultural achievement building you
selected. Only the topmost building in the stack
is available to be built. After it has been taken and built, a new
cultural achievement building is revealed and is available to be built.
You pay for statues by paying three artifacts. All statues are available to be built
from the start of the game.
When you build a cultural achievement, you take the shown bonus immediately, if any.
Confidence Points are scored at game end. A player may never build more than TWO
cultural achievements during the game.