|
|
Game Rules
Game Overview
Players take the role of noble families with landholdings in the countryside around Messina. They attempt to rescue people
from the plague, putting infected people in quarantine and putting uninfected people to work on their estates. As the plague
in Messina worsens, the players will build small independent communities, while attempting to control the plague with fire.
Players will also have the opportunity to defy the plague and return the rescued citizens to repopulate the city. At the end of
the game, the player who did the most for Messina is the winner.
Game Setup
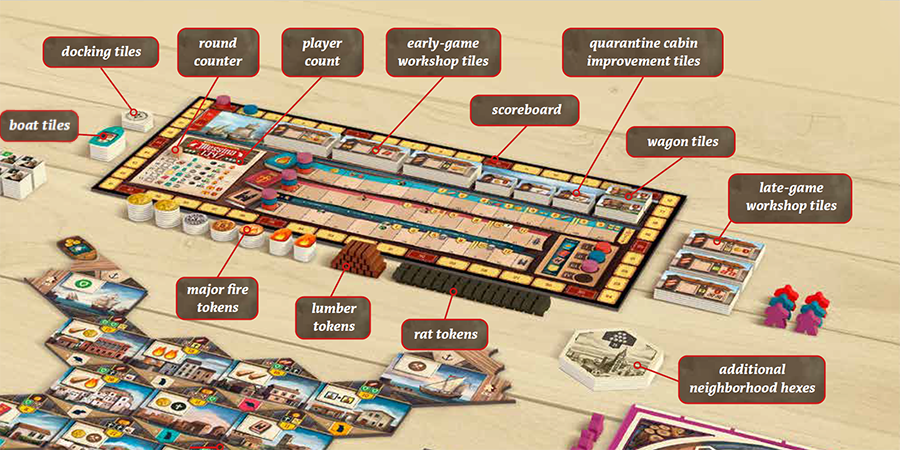
The City of Messina: Messina is built of hexagonal neighborhood
tiles. Separate the neighborhood hexes into three
classes – A, B, and C.
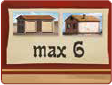
Some of the A hexes are not intended to be used in all
player counts. Sort through the A hexes and remove those
that do not match the current number of players. Return
them to the box.
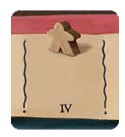
|
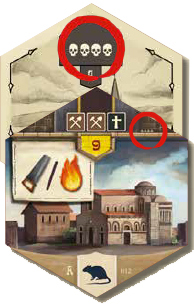
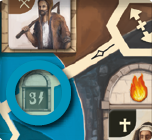
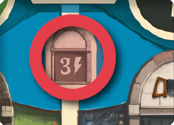
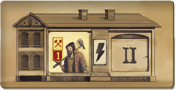
This hex is for a 4-player game
only. It should be removed
in a 2- or 3-player game.
|
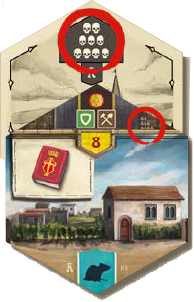
|
This hex is used
in all player counts.
|
Form a stack of the appropriate A hexes. Add 1 B hex, chosen at
random, and mix up the stack face down. Then deal out hexes
face up in a random order to build the city of Messina. Also
place the four harbor hexes and place them at four corners so
they fit the shape of Messina (as shown below the text).
A three-player setup is illustrated on these pages. The layout
depends on the number of players, as shown below.
Neighborhood Hex Tile Stack: The B and C hexes are used in
all player counts. Mix up the stack of C hexes face down. Place
the remaining B hex face down on top of the stack and place
the stack where it will be easy to reach at the end of each round.
Tokens: Keep the fire tokens, major fire tokens, rat tokens,
lumber tokens, and citizen tokens close at hand. You will need
them frequently during the game. The supply of these tokens is
not intended to be limited.
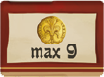
Plague Cubes: The plague cubes are limited by the number of
players. Two players use 16 cubes. Three players use 18 cubes.
Four players use all 24 cubes. Leave any excess cubes in the box.
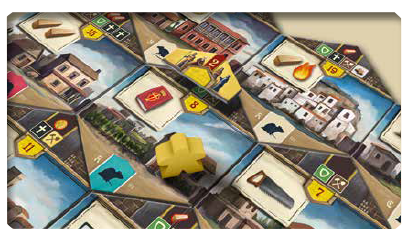
Population Wheel: Keep the population wheel nearby, where
at least one player can reach it. A rat icon and an arbitrary set
of 3 colors should be visible in the window.
Other Tiles
The other tiles need to be separated into stacks and shuffled.

|
Docking Tiles are shuffled into a facedown
stack. Whenever this stack is empty,
reshuffle all the tiles to make a new stack.
|
|
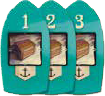
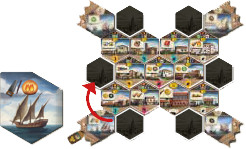
Boat Tiles are sorted into stacks by number.
Shuffle each stack then stack them
in order with 1 on top. Place them by
the scoreboard. In a 2-player game, first
remove all boats with precious stones as
cargo and use only 6 boat tiles.
|
|
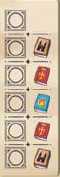
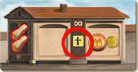
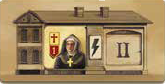
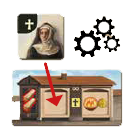
Quarantine Cabin Improvement Tiles are
separated randomly into 3 equal stacks.
Place them on the scoreboard face down,
then turn up the top tile in each stack.
|
|
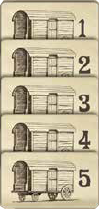
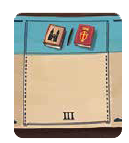
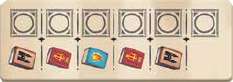
Wagon Tiles are separated into five
pairs. (Look at the numbers on the backs,
not the point values on their faces.) Randomize
each pair face down and make
two stacks using wagons 1 to 5 in order.
Flip the stacks over so that wagon 1 is on
top, face up, and place the stacks on the
scoreboard. In a 2-player game, one of
the stacks is returned to the box and only
one is used.
|
|
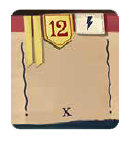
Place the scoreboard next to Messina. The side shown here is
used in a 3- or 4-player game. Use the other side for a 2−player
game. Players will place their counters on the board, as explained here.
Place the round counter on space I of the round info table on
the scoreboard.
The register priority tile is not needed in your
first game. You can leave it in the box. For later
games, you can use it to replace the first column
of the round info table, thus altering that parameter
of the game.
|
|
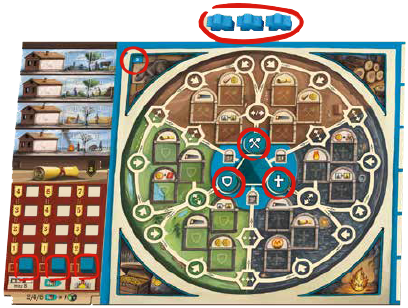
Player Setup
|
|
Each player chooses a color. Take the player board, the figures,
the cubes, the counters, and the overseer tokens in your
color. You also take a scroll board, which fits beside your player
board as shown below.
Keep 3 of your figures near your board for now. You will send
them to Messina on your first turn. Put 2 of your figures on
the table in the token supply. You may be able to claim them
during play.
Place your 3 cubes at the bottom of the three tracks on your
scroll board, as shown.
|
|
|
Your player board uses 3 overseer
tokens. Take the tokens in your
color and place them on the corresponding
starting spaces near
the center of your board.
|
|
|
Use the a side of your player
board and your scroll board.
|
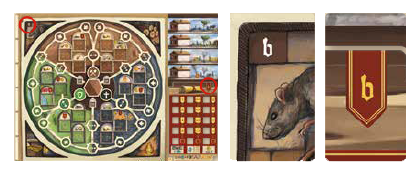
Advanced Game Setup
|
Experienced players have the option of playing with
asymmetric opportunities. In this variant, player
boards are assigned randomly and all players use the
b side. (The asymmetric side is brown, so it can be used
with any player color.)
The scroll boards are also asymmetric. Take a randomly
assigned scroll board and use its b side.
|

|
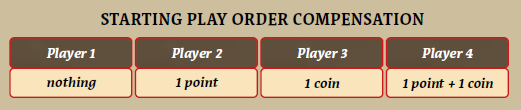
Play Order
Take one counter from each player and place them in a random
order on the player order indicator on the scoreboard. Players will
take turns in this order in round I.
On space I of each of the three register tracks, stack players'
counters in the opposite order. (Position in a stack may be important
when order is rearranged at the end of a round.)
On the scoring track, the first and third player start on space 0,
with the third players counter on top. The second and fourth
player start with 1 point (on space 1), with the fourth player’s
counter on top. Finally, give 1 coin to the third and fourth players.
For space reasons the Yucata.de implementation has no points track. The order of players on the points track is however important because it can affect the player order in a round (see e.g. priority tile 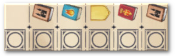 ).
Therefore at Yucata.de this order is shown in the top left corner of the scoreboard, where the top color is of the player who is the farthest ahead on the points track: ).
Therefore at Yucata.de this order is shown in the top left corner of the scoreboard, where the top color is of the player who is the farthest ahead on the points track:
 . .
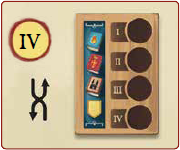
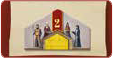
Round I Setup
You are now ready to add boats, plague cubes, and citizens to
Messina.
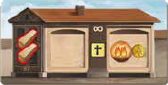
A Boat Docks
|
In round I, 1 boat arrives:
-
Draw the top docking tile from its stack to determine which
dock gets the boat.
- Place the top boat tile in one of the dock’s spaces, face up.
- Give that boat tile 1 plague cube.
|
|
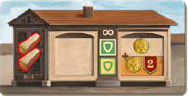
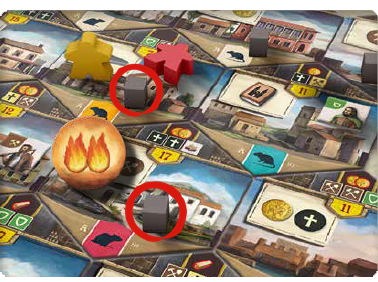
Population Wheel
Now the plague spreads throughout the city.
-
Turn the window of the population wheel 1 space clockwise
to reveal a new set of icons.
-
Add 1 plague cube to every hex with a rat matching the one
shown. (There are 3 rat icons – left, right, and standing.)
-
For each of the three classes of citizens, add 1 citizen of
that type to each hex that matches the color shown on the
wheel.
|
|
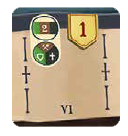
In this case, a plague cube goes on each hex with a left-facing rat.
Each orange hex gets 1 nun, each white hex gets 1 craftsman, and
each blue hex gets 1 aristocrat. Red hexes get no citizens.
|
Gameplay
|
|
Messina is played in 6 rounds.
Initially, every player has 3 lieutenant
figures and will get 3 turns
per round. Later in the game, some
players may have more lieutenants
and they will get more turns. The
round ends when all players have
used all their lieutenants.
Players take turns in the order
shown on the scoreboard.
|
Your turn
On your turn, you perform these steps in order:
-
Choose a hex and place one of your
lieutenant figures on it.
-
Rescue the citizen, if there is one,
and take the citizen to your estate.
-
Fight the plague.
-
Either perform the action depicted on the
hex, or repopulate the neighborhood.
|
|
Your efforts to fight the plague may give you
actions from the popularity register which
you can use any time during step 4.
|
|
|
Also at any time during step 4, you may pay
to advance on the city register or the church
register. You may advance multiple times in
one turn, if you wish. This may give you more
actions to use during step 4.
|
Other Types of Turns: Two other types of turns – (a) sending
a lieutenant to the docks or (b) recalling a lieutenant to your
estate – are explained here.
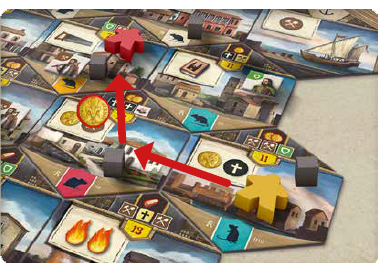
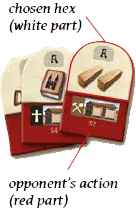
1. Choosing a Hex
|
|
In round I: Simply take your lieutenant figure from your estate
and stand it on a hex that does not yet have a figure on it.
Your figure marks the hex where you will work this turn, and
it blocks everyone (including you) from choosing that hex on
later turns this round.
|
|
|
In Rounds II–VI: You already have lieutenants in Messina, on
the hexes they occupied in the previous round. They begin the
new round lying down to show they have not been used and are
not blocking that hex.
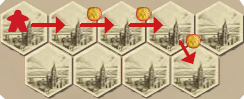
When choosing a hex for a lying-down figure, you can choose
the same hex or an adjacent hex for free. But to choose a hex
farther away, you must pay 1 coin for each hex beyond the first.
For example, moving 4 hexes away would cost 3 coins.
|
|
|
First movement is
free. Second and
further costs one
coin for each hex.
|
You are not allowed to choose a hex marked by a standing-up
figure – that hex has already been used this round.
Stand your lieutenant figure in your chosen hex to show that
the lieutenant and the hex have been used. Each of your lieutenants
will be used exactly once during the round, and no hex
will be used more than once.
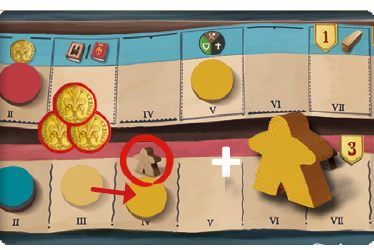
Additional lieutenants: You may acquire additional lieutenants
from the city register track (which will be explained here).
The new figure will start out on your estate. On your
turn, you may use that lieutenant only if all your lieutenants in
Messina have already been used this round.
Lieutenants coming from your estate are placed according the
rules used in round I – you can choose any hex in Messina not
occupied by a standing-up figure.
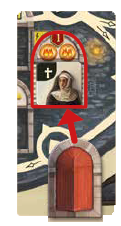
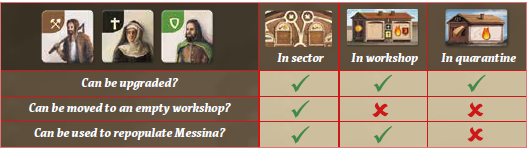
2. Rescuing a Citizen
If your chosen hex has a citizen token, you rescue that citizen
(citizens). Add the token to your estate, depending on whether
the hex has plague.
If the chosen hex has no plague cube, you place the citizen
on one of the empty squares in the sector that matches your
citizen’s class. (The top sector is for craftsmen, the left sector is
for aristocrats, and the right sector is for nuns.) There are six
squares in each sector; if none of these is empty, discard the
citizen token.
If the chosen hex has a plague cube, your citizen must go to
quarantine. Place the token in space I of any empty quarantine
cabin. If all cabins already have a citizen (in space I or II) you
must discard the new citizen.
Every cabin line can hold exactly
one citizen even if there is one of the two spaces free.
|
|
Red chooses a hex with a nun. The hex has no plague cube, so when
Red rescues the nun, she must place the nun in an empty square in
the gray sector of her estate. The chosen square will be important
later, but it does nothing at this time.
|
|
|
By contrast, if there is a plague cube on the hex, then the nun cannot
go to the gray sector and Red would have to put the nun in
space I of an empty quarantine cabin.
Note: A citizen from a plagued neighborhood must go to quarantine
even if you eliminate the plague in the next step of your turn.
|
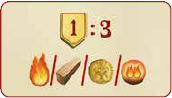
3. Fighting Plague
Once the citizen is evacuated, you may be able to destroy the
plague in that neighborhood.
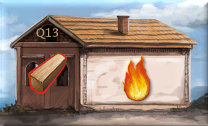
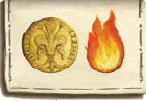
If the chosen hex has a plague cube, you may pay 1 fire token
to remove the plague cube. If it has multiple plague cubes you
may remove as many as you like, paying 1 fire token for each.

|
In later rounds, the cost to remove a plague
cube is 2 fire tokens, as shown on the round
info table. In this case, for each plague cube
removed, score 2 points.
|
After you spend fire tokens, if there are any plague cubes left on
your chosen hex, gain 1 rat for each plague cube. (The plague
cubes remain on the hex for later rounds.)
At the end of the game you will be penalized for your rat tokens. (See here).
|
For each plague cube you removed, advance 1 space on the
popularity register. If this leads to one or more actions (see
here)
you may resolve them before, after, or during your hex
action.
|
|
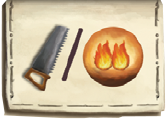
Fire Tokens

|
You start the game with no fire tokens, but
you can acquire them during play. Initially,
it costs 1 fire token for each plague cube you
remove from your lieutenant’s hex. Later in
the game, the cost rises to 2 fire tokens per
cube.
|

|
You could also acquire a major fire token.
When you use this to remove a plague cube
from the hex, you have the option to
remove
a cube from an adjacent hex as well.
|
Special Cases:
-
You can use a major fire token as a regular fire token
and ignore its ability to remove 1 adjacent cube.
-
The plague cube on a boat is not “adjacent” to any
hex, dock, or other boat, so if you use a major fire
token on a boat, you will not be able to remove an
additional cube.
-
If 2 fire tokens are required to remove 1 plague cube,
you need to spend 2 major fire tokens to have the option
of removing an adjacent cube.
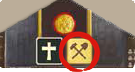
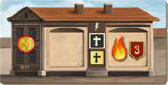
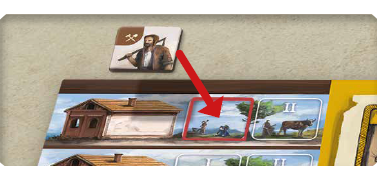
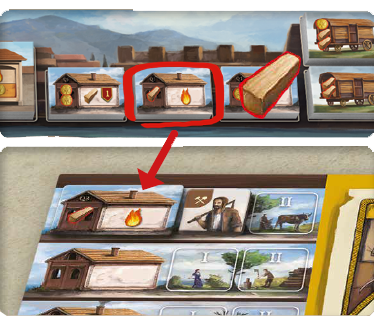
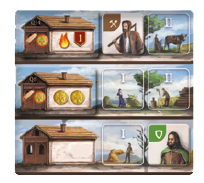
4. Performing the Hex Action
|
Every hex has an action illustrated
in the upper left corner. You perform
that action as the last step of your
turn.
|
|
Most hexes can be repopulated with
citizens from your estate. If you
choose to repopulate the hex, you do
this instead of the illustrated action.
|
Also during this step of your turn, you may use any actions you
received from the popularity register and you may also pay to
advance on the other two registers, which could lead to even
more actions. These register actions may be resolved in any order
before, after, or even during your hex action.
The various actions will be explained on the following pages.
The registers are explained here in detail.
Other Types of Turns
There are two other ways to use your lieutenant’s turn.
Recalling a Lieutenant
On your turn, instead of sending your lieutenant to a hex or
a dock, you can recall it to your estate. Simply stand it beside your
board and gain 1 coin. The lieutenant cannot be used again until
the next round.
This is not a very efficient use of your lieutenant, but it gives you
a way to deal with situations where all the nearby hexes are blocked
and you cannot afford the cost of traveling to a farther hex.
Choosing a Boat
On your turn, you can send your lieutenant to choose a boat
instead of a hex. The steps are similar to a regular turn:
-
Choose a boat in Messina and move your lieutenant to its
dock, according to the usual movement rules. (Count the
dock as a separate hex adjacent to the harbor.)
-
You may even go to a dock that has already been visited by
another lieutenant this round.
-
Fight the boat's plague cube, or gain 1 rat token if you
choose not to fight it. (Either way, the plague cube is discarded.)
-
Take the boat tile to your estate. Gain coins or score points,
as indicated on the boat tile.
|
After taking the tile, if you now have
an even number of boats, you may advance
one of your overseers. Overseers
are explained here.
|

|
Also during this step, you may buy advances
on the city and church registers
and use any register actions you have
earned, in any order, as usual.
|
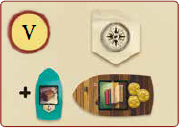
The goods on the boat tile will have an impact during final
scoring. In the standard game, all types of goods will count the
same. In the advanced variant, you are trying to collect goods
of one type. (See here.)

|
The three types
of goods are
precious stones,
spices and silk.
|
Docks versus Hexes

|
Docks are like hexes with these differences:
-
The dock does not get plague cubes; instead, each
boat comes with its own plague cube.
- The dock, like a harbor hex, does not get citizens.
-
A lieutenant at a dock does not block other lieutenants
from using that dock. Instead, lieutenants are
limited by the availability of the boats.
When moving a lieutenant, the dock counts as its own
hex, adjacent only to its harbor hex. So every neighborhood
adjacent to the harbor hex is 2 hexes away from
the dock.
|
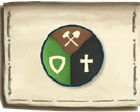
Actions
The hex you choose allows you to take one specific action. Some
actions have simple consequences, such as gaining a fire token.
Some actions lead to other actions, which offer many interesting
opportunities to build your reputation.
Gaining Tokens
|
|
To perform these actions, simply take the indicated tokens.
There is no limit to the number of tokens players may have.
|

|
Coins come in three denominations.
Players can
make change as needed
at any time.
|
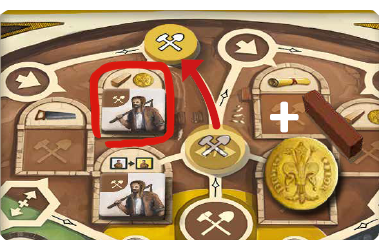
Actions with Options
|
A slash indicates that you
choose between two options.
In this case, the options are
Build
or gain
a major fire token.
|
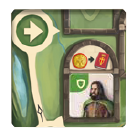
Advance on Register
|
This action allows you to advance
one space on either the
city register or the church register.
You can also pay to advance
on these registers at any
time during the Action step of
your turn, but the actions depicted here allow you to advance
for free. The registers are explained in detail here.
|
Advance on Your Scroll Board
|
Your scroll board has 3 tracks,
each rewarding a different
aspect of play. When you take
this action, choose one of
those tracks and move your
marker up one space. Your
scroll board will be important during final scoring, so it is
explained in detail here.
|
Advance an Overseer
|
Your estate is managed by 3 overseers – the 3 round tokens that
start in the middle of the board. When you have an opportunity
to advance an overseer, you may be able to gain benefits
from some of the citizens on your estate. Each of the actions
allows you to advance the matching overseer
1 space along its path.
|
|
|
This action allows you
to advance 1 overseer
of your choice.
|
|
When you advance an overseer
with this action, you
have the option to first skip
over one step in the path.
|
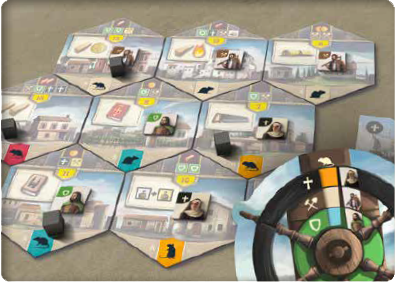
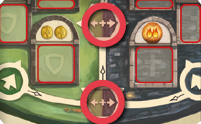
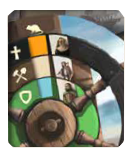
Overseers's Path
|
The overseer advances along the indicated path. On the
second advance, you must choose whether the overseer
travels along the left branch or the right. (Choose wisely.
There is no way to go back.) The chosen path leads
around the edge of the board, then back toward the center
along the border between two sectors. An overseer
who has completed all six steps of the path cannot be
advanced again.
It is possible for two overseer tokens to be on the same
space.
|
|
Activating Citizens
|
Each space of the path allows you to activate a certain number
of citizens in its vicinity when the overseer advances
onto it. During one advance you cannot activate the same
citizen twice.
|
|
|
Activate one immediately adjacent
citizen.
This space is
connected to 2 squares in your
estate. If there is a citizen token
on either of those squares, you
may take the action depicted
above the citizen token. If there
are citizens on both, you may
choose either action (but not
both).
The overseer can activate the nun to give you a fire token. If
there were also a nun in the square with the Build action, you
could choose that action instead.
|
|
Activate one citizen in this region.
This space is adjacent to
a region with 3 squares. Choose
any citizen in that region and
perform the action depicted
above the token.
The overseer can activate either
of these two nuns.
|
|
Activate one citizen in each region.
This space points to two
regions in two colors. Choose one
citizen in each region and activate
them both. You may activate
them in either order. (If only one
region has citizens, you activate
only one citizen.)
The overseer can activate one nun
and one craftsman. (It is not allowed
to activate both nuns.)
|
|
Activate up to 3 citizens, anywhere
in the three sectors of
your estate.
They can come
from the same sector and even
the same region, if you want.
Your overseer ends in the center
of your estate and cannot be advanced
anymore.
|
Upgraded overseer
|
Certain advances on the church register allow you to upgrade
an overseer. Flip the chosen overseer token over to its upgraded
side. From now on, it can bring you an extra activation in its
region when it advances. However, you still cannot activate the
same citizen twice during one advance.
|
|
|
If both adjacent squares have
citizens, the upgraded overseer
activates them both. (But if only
one has a citizen, you activate
only that one.)
|
|
Activate up to 2 citizens in
this region. If there is only
one citizen, you can only activate
that one.
|
|
Activate up to 2 citizens in the
upgraded overseer’s matching
adjacent region and 1 citizen
in the other adjacent region. If
there are fewer citizens in those
regions, you can activate only
the citizens available.
|
|
Activate up to 3 citizens,
anywhere in the three sectors
of your estate, just as
a nonupgraded overseer
does.
|
Upgrade a Citizen

|
This action allows you to upgrade any
of your citizens. The token can be in
a workshop, in one of the three sectors,
or even in quarantine. Flip the token
to the gold side. The citizen is now upgraded.
This has the following effects:
If the citizen is in a workshop, it will
produce 1 point during the Production
phase of the round.
|
|
Some workshops require an upgraded
citizen. (See here.)
Others produce
more if they are worked by an upgraded
citizen.
|
|
|
Some neighborhoods require upgraded
citizens when you Repopulate them. (See here.)
|
|
Build

|
This action gives you an opportunity
to improve your estate
(which will pay off at the end of
the round). Alternatively, you can
use it to build a wagon to help you repopulate Messina. The
Build action has 3 options:
|
-
Build a quarantine cabin improvement.
-
Build a workshop.
-
Build a wagon.
Tile Cycling: At the start of your Build action, you may cycle either
all quarantine cabin improvements or all workshops. Pay
1 point or 1 token of any type. Move the top tile of each stack to
the bottom and turn up a new tile. After this, you must choose
one of the 3 options, unless there is no tile you can legally build.
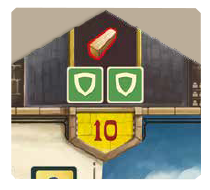
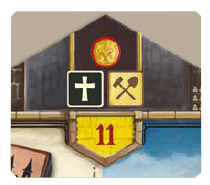
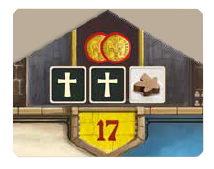
Quarantine Cabin Improvements
|
Quarantine cabin improvements
are available on the
scoreboard. Choose one of
those available, then turn
up the next tile to make it
available for later Build actions.
Pay the cost by returning the indicated tokens to the bank. (If
you can’t pay the cost, you can’t take that improvement.) Choose
one of your quarantine cabins that has no improvement and
place the tile on it. A citizen in that cabin will now be able to do
work for you at the end of the round. (See here.)
|
|
Workshops
|
Choose an available workshop from the scoreboard and turn up
the tile below it.
Pay the cost and place the workshop in one of the slots alongside
your board. (If you somehow manage to get more than 6 workshops,
just keep them all in roughly the same place.) You may
move a citizen of the appropriate type from its sector to the
empty square of the workshop at any time. Sometimes you will
do this immediately, but it is legal to wait until Production or
until you need to make room in the sector for a rescued citizen.
(A citizen in quarantine cannot be moved to a workshop, nor can
a citizen from another workshop.)
Each workshop will accept only one class of citizen. If the workshop
requires an upgraded citizen, you may put a nonupgraded
citizen there, but the workshop gives you no rewards until the
citizen is upgraded.
|
|
|
|
Only an aristocrat may work
here. He may be upgraded or
not.
|

|
|

|
This cabin gives an immediate
reward when it has an upgraded
aristocrat. If you give
it a nonupgraded aristocrat, it
will give you the reward when
the aristocrat is upgraded.
|
|
|
Early-Game Workshops: At the beginning of the
game, the workshops you can build are the type
that will produce at the end of every round.
(See here.)
|
|
This workshop gives you nothing
immediately, but it will give you
1 major fire token and 1 coin at the
end of every round as long as it has
an upgraded nun.
|
|
|
Late-Game Workshops: When you set up for
round V, the workshops on the scoreboard are replaced
with a new set. These can be constructed
according to the same rules. However, when the
citizen is placed in the workshop, you gain the indicated rewards
immediately. This reward is received only once – a late-game
workshop will not produce at the end of the round.
|
|
Flip the tile face down (but leave
the citizen on top) to show its reward
has been used.
|
|
This workshop gives you a onetime
reward of 1 fire token and
3 points. You get the reward as
soon as it has an upgraded or
nonupgraded nun.
|
Wagons
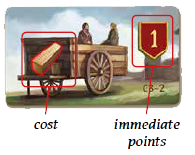
|
Choose an available wagon from
the scoreboard. In a 2-player
game, only one is available. Two
are available in games with 3 or
4 players.
|
Pay the cost of the wagon. If any points are depicted, score them
immediately. Keep the wagon near your player board. You will
be able to use it when you repopulate Messina.
Repopulate Messina
When it is time to perform the action depicted in your chosen
hex, you may ignore that action and repopulate the hex instead.
However, there are two restrictions:
-
You cannot repopulate a harbor hex or a dock.
-
You cannot repopulate a neighborhood that has already
been repopulated.
To Repopulate your Lieutenant's Hex:
-
Pay the depicted cost.
-
Use one wagon. Flip it over to show it is used. Each
wagon can be used only once per round.
-
Return the required citizens – and possibly, required
lieutenants – to the token supply.
-
Place one of your repopulation tiles on the hex.
-
If the hex has 1 or more disease cubes, gain 1 rat
token.
If you have used all your repopulation tiles, you cannot repopulate
anymore.
Repopulation costs and requirements
Each hex depicts a cost and the citizens required to repopulate it:
|
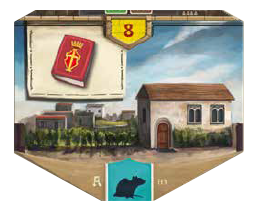
Repopulating this neighborhood
costs 1 lumber. It requires
2 aristocrats.
Upgraded citizens can repopulate
neighborhoods where
regular citizens are depicted.
But if an upgraded citizen is
depicted, an upgraded citizen
is required.
|
|
Repopulating this neighborhood
costs 1 coin. It requires
1 nun – upgraded or not. It also
requires 1 upgraded craftsman.
(A regular craftsman is not sufficient.)
|
Some neighborhoods also require one of your lieutenants. In
this case you must use a lieutenant that is still available for use
this round (either an unused figure at your estate, or one that
is still lying down on a hex). Return the figure to the box.
|
Repopulating this neighborhood
costs 2 coins. It requires
2 nuns, and it requires you
to give up one lieutenant you
have not used this round.
|
Repopulation tiles
|
When you repopulate a neighborhood, cover the repopulation
requirements with one of your repopulation tiles. For the remainder
of the game, no one can take the Repopulate action
there. Your reputation is now tied to this neighborhood, and
what happens there will reflect well or poorly on you:
-
Whenever that hex is chosen by any player’s lieutenant
(including yours), you immediately score 2 points (as depicted
on the repopulation tile).
-
Whenever that hex gets a disease cube, you gain 1 rat.
|
|
Citizen Movement Summary
|
Citizens appear in Messina when
you set up for the round. When you
rescue them, they go to your estate
– either to a quarantine cabin
if they came from a plagued neighborhood,
or directly to the appropriate
sector if their neighborhood
had no plague cubes.
|
|
Citizens in quarantine will stay
there for two rounds – the round
in which you rescued them, and
the next round. Citizens in quarantine
cannot be moved to workshops
and they cannot repopulate Messina.
When a citizen comes out of
quarantine, you move the token to
a square in the appropriate sector
of your estate.
|
|
Once assigned to a square in its
sector, a citizen token will remain
there unless it is placed in a workshop
or sent back to repopulate
Messina. There is no way for a citizen
to move to a different square in
its sector.
|
|
A citizen can be moved from its sector
to an appropriate workshop at
any time, even during production.
A citizen in a workshop can be sent
to repopulate Messina, but it cannot
be transferred back to its sector
or to another workshop.
|
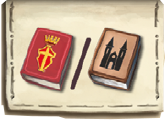
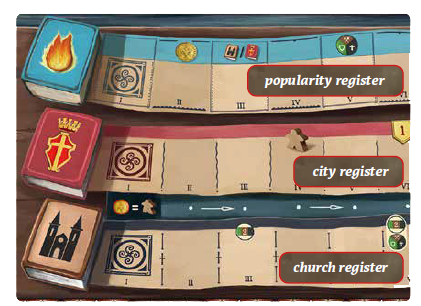
Registers
|
Three registers in the center of the scoreboard measure your
reputation with the people, the city, and the church.
Your position on these registers determines play order (see here)
and at the end of the game, it may give you points (see here).
Advancing on a register can often give you immediate
benefits as well.
|
|
Advancing
|
|
The only way to advance on the popularity register is to
fight plague, as explained here.
|
|
|
At any time during the Action step of your
turn, you can pay to advance on the city
register or church register. You may advance
in this way as often as you like.
The cost is one coin per lieutenant. Count the
3 lieutenants you start with plus any you
acquired during play, including even lieutenants
you returned to the box when you
sent them to repopulate Messina.
For simplicity reasons, the Yucata.de implementation doesn't allow to advance this way at really any time during the Action step. For example this is not possible while handling a field benefit like e.g. advancing an overseer. This however does not restrict the advancement on the registers. It is still possible to advance at any meaningful time during the Action step.
|
|
Certain actions may
lead to a free advance
on the city register or
the church register. You
pay nothing for these.
|
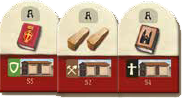
Types of Actions
|
The popularity register offers actions similar
to those you might get from city hexes.
These can be used any time during the Action
step of the turn in which you earned
them.
|
|
The city register is the only way to get more
of your lieutenants in play. When you advance
to a space with a figure, take one of
yours from the token supply and lay it beside
your board. You may send it to Messina
on a later turn this round, after all your
lieutenants already in Messina have been
used.
|
|
When you advance to this space in the city
register, you may take any action depicted
on any hex in Messina, even if the hex
is blocked by a player’s figure (including
yours). This includes harbor hexes, but not
docks.
|
|
The church register can let you upgrade or
advance your overseers on your estate, as
explained here. This particular space
allows you to choose one overseer, upgrade
it if it is not already upgraded, and then
advance it.
|

|
When you advance to a space
like this on the church register,
you may activate the
indicated number of citizens
on your estate. (This is
like the  action you get for
your overseer, as described here.) action you get for
your overseer, as described here.)
|
If an advance lands you on the same space as another player, put your counter on top of theirs. This may be a play-order tiebreaker at the end of the round.
At Yucata.de there is the following implementation: If a player's counter is on the last space of a register and the player would advance, then the counter will stay on the last space, but it will move to the top of the stack of counters if there are any counters of other players on this same space.
Advancing during production
|
If you get an advance on
a register during production,
move your counter
immediately. However, if
this advance leads to an
action, you do not take
the action until the Action
step of your next
turn. (And if this happens
at the end of the final
round, you will not take
the action at all.)
|

|
Example Turn
|
Yellow wants to take a Build action. He decides to move the
lieutenant shown above. Movement to the adjacent hex is
free, but the additional move costs 1 coin. Note that Red’s
figure is lying down and therefore is not blocking the hex.
Yellow will stand his figure on the chosen hex, indicating
that the hex may not be used again this round.
|
|
Yellow takes the citizen token from the chosen hex. Because
the hex has a plague cube, the citizen needs to go to space I
of an empty quarantine cabin.
|
|
Yellow can spend a fire token to destroy the plague cube on
his hex. He chooses to spend a major fire token, which also
allows him to destroy a cube on an adjacent hex.
|
|
Destroying 2 cubes allows him to advance twice on the
popularity register. The first advance has no additional
effect, but the second advance allows him to advance an
overseer in the next step of his turn.
|
|
Yellow could build first and then advance an overseer, but he
decides it’s better to advance an overseer first. The overseer
shown above allows him to activate the craftsman that gives
him 1 coin and 1 lumber. (He could have activated the other
craftsman instead, but this one will help him build.)
|
|
Now Yellow spends that lumber token to improve the quarantine
cabin where he put the craftsman. The craftsman will
produce a fire token during Production at the end of the
round. Yellow could end his turn now, but he sees an opportunity
to get another lieutenant.
|
|
Yellow pays to advance on the city register. Because he currently
has 3 lieutenants, the cost is 3 coins. The advance
gives him a fourth lieutenant. Yellow lays the figure beside
his estate. He will be able to use the figure later this round,
once he has no more unused lieutenants in Messina. Yellow
could advance on the city or church register again this turn,
but now the cost is 4 coins because he has taken the fourth
lieutenant.
|
End of Round
The round ends once all players have used all their lieutenants.
Citizens in buildings may produce at the end of the round. After
production, citizens advance through quarantine.
Production
Usually, players can all handle production simultaneously. But
if order is important, produce in the play order shown on the
scoreboard.
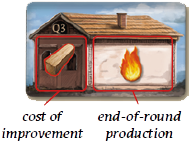
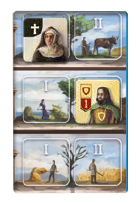
Quarantine cabins
A citizen in a quarantine cabin will produce as shown on the
improvement tile. If the cabin has no citizen or no improvement,
it does not produce.
|
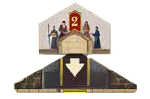
The craftsman in the first cabin
will produce 1 fire token and
1 point. The middle cabin has no
citizen and will not produce. The
aristocrat in the third cabin cannot
produce because the cabin is
not improved.
|
Workshops
Each citizen in an early-game workshop (with the  symbol)
will produce as shown on the workshop. A workshop with no citizen
will not produce. An upgraded citizen in a workshop will
also produce 1 point. Some workshops have two levels of production,
regular and upgraded. symbol)
will produce as shown on the workshop. A workshop with no citizen
will not produce. An upgraded citizen in a workshop will
also produce 1 point. Some workshops have two levels of production,
regular and upgraded.
|
Because this nun is upgraded,
she produces 2 fire tokens instead
of 1. She will also produce
1 point.
|
 Late-game workshops offer one-time benefits. They do not
produce. However, an upgraded citizen in a late-game workshop
will still produce 1 point. Late-game workshops offer one-time benefits. They do not
produce. However, an upgraded citizen in a late-game workshop
will still produce 1 point.
|
This citizen produces 1 point
because he is upgraded. The
workshop's rewards were gained
when it was built – it will not
produce them now.
|
Quarantine
At the end of the round, after all production has been resolved,
advance all the citizens in quarantine.
-
A token in the left quarantine space moves into the right space.
-
A token in the right quarantine space moves out of quarantine.
Place the token on an empty square in the appropriate
sector of your estate or in an empty workshop of the matching
type.
Setup for Next Round
|
Advance the round counter to
the next round.
|
|
Lay all lieutenant figures in
Messina flat on their hexes to
show that they have not been
used yet in the new round.
|
|
Remove citizen tokens from
hexes that have plague cubes.
|
|
Check the round info table to
see which register has priority
this round. Rearrange the counters
on the play-order indicator
according to who is ahead
on that register. If players are
tied, the one ahead is the one
who moved to that space most
recently. (Their counter should
be on top.)
|
|
In this round, priority is determined
by who is ahead on the
scoring track.
|
|
Draw a docking tile from the
stack and place a boat tile in
one of the spaces at the indicated
dock. Give the boat 1 plague
cube.
|
|
If the round info table indicates
two boats arrive, place a second
boat (with a plague cube) at
that same dock.
|
-
After using the last docking tile in the stack, shuffle all
4 tiles together to make a new stack.
-
If all 3 spaces at a dock are full, place the boat in a space at
the next dock, clockwise.
|
|
Add a new hex tile to Messina. The city has six spaces for new
hexes. These spaces are illustrated here.
To find the correct space to fill, start at the harbor
hex chosen in step V and go around the perimeter clockwise
until you come to a space that has not been filled yet. Add the
new hex tile there.
|

|
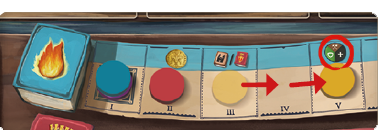
If it is now the beginning of round V, remove
all workshop tiles from the scoreboard. Replace
them with the late-game workshop
tiles, which are set up in the same way.
|
|
|
Rotate the window of the population wheel one space clockwise.
Then add plague cubes, as explained here.
|
|
In rounds marked with this icon,
rotate the wheel one more space
and add plague cubes again.
|
Plague cube limit: The supply of plague cubes is limited and
depends on the number of players. It may happen that you cannot
add cubes to all the hexes that are supposed to get them. In
this case, you do not add any cubes at all. If you are supposed
to add plague cubes twice, add them in two separate steps – it
may be possible to add cubes in the first step even if there will
not be enough left for the second step.

|
Add citizen tokens as explained here. You
are now ready to play the next round. Play in
the order shown on the play-order indicator.
|

|
By round VI, the plague has begun to abate.
The neighborhoods of Messina get no new
plague cubes and no new citizens in need of
rescue. However, plague cubes continue to arrive
on boats.
|
Don’t Forget: Players who used wagons should flip them
over to show they can be used again in the new round.
When a plague cube is added to a repopulated neighborhood,
the player who repopulated it gets a rat token.
End of Game
The game ends at the end of round VI, after players take their
production from workshops and quarantine cabin improvements.
Rat Penalty
|
During the game, players may have
acquired rat tokens. These represent
plague events that damage
players’ reputations. Now it is time
to pay the penalty.
|
For each rat token you acquired during the game, move back
1 space on the popularity register. If this moves you off the left end
of the register, simply leave your counter on the starting space.
|
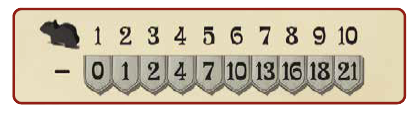
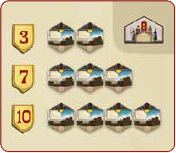
Lose points for your rat tokens according to this table:
|
|
For example, if you have 7 rat tokens, you lose 13 points. The maximum
penalty is 21. If you somehow manage to lose more points
than you have, you will go into Final Scoring with negative points.
Final Scoring
The following points are scored at the end of the game:
Points on Registers
|
After taking penalties for your
rat tokens, evaluate your final
position on each register. If there are points shown on your current
space, score those points at this time.
|
|
|
On the popularity register, players also get points
for being farther ahead. In a two-player game, the
first player gets 5 points. In a three- or four-player
game, the first player gets 10, second gets 7, third
gets 3. Break ties in favor of the player with more
fire tokens. For this tiebreaker only, count a major
fire token as 2 fire tokens.
|
Repopulated Neighborhoods
|
Score the points shown on each
hex that you repopulated. (Do not score the 2 points shown on
your repopulation tile – you scored those points whenever a lieutenant
visited the repopulated neighborhood.)
|
Scroll Board
|
During play, you had the opportunity
to take scroll actions that
advanced your markers on your
scroll board. Now you will score points for three aspects of your
reputation. Your markers show how much each aspect is worth.
An example is
here.
|
|
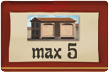
Count all the buildings you built. (Buildings
are quarantine improvements and workshops,
but not wagons.) For each building, score the
indicated number of points – but if you have
more than 6 buildings, score only 6 of them.
|

|
Score the indicated number of points for
each cargo of exotic goods that you took during
the game. The different types of exotic
goods have a meaning only in the advanced
variant. In the standard version of the game,
this is the same as scoring points for each boat tile you took.
|
|
For each of your repopulation tiles in Messina,
score the indicated number of points.
|
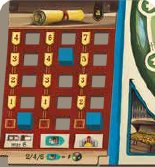
Remaining Tokens
|
Add up your remaining coins, fire
tokens, major fire tokens, and lumber
tokens. Divide by 3 and round
down. Score that many points.
|
The Winner
The player with the highest score has the best reputation in
Messina and thus wins the game. Break ties in favor of the player
who repopulated the most neighborhoods, then in favor of the
one who repopulated the neighborhood worth the most points.
Advanced Variant
The other sides of the player boards and scroll boards are used
for asymmetric play.
Setup
|
Assign player colors randomly. Each player takes the board in
that color and uses the b side. (Quarantine cabins will be on
the right.) Mix up the scroll boards and assign them randomly.
Each player uses the b side.
Note: It is also possible to use the a player boards with b scroll
boards, or vice versa, but these variants have not been playtested.
|
|
Gameplay
Gameplay follows the same rules, but your decisions will be different
because your boards offer you different opportunities.
|
Each sector has one square that offers a generous
reward that can be used only once per
game. These squares are marked by the
symbol in the corner.
When you activate a citizen in such a square,
mark it with a solo game tile to remind you
that you cannot use it again. (In solo games,
mark it with a spare token.) The citizen remains
there even though it cannot be activated
again. However, the citizen can be sent to
a workshop or to repopulate Messina, as usual.
|
|
Final Scoring
Additional points for repopulating
|
In addition to the usual ways to score points, players compete
to see who can repopulate the most neighborhoods. The player
with the most gets 10 points, second most 7, third most 3.
A player who repopulated no neighborhoods gets no points.
Break ties in favor of the player whose neighborhoods are worth
more points (in step 2 of final scoring). If players are still tied,
divide the points for all tied places evenly among them.
|

|
In a 2-player game, first place is worth 7 points and there are
no points for second.
Scroll board tracks
The alternate scroll boards offer you several new ways to score
points.
|
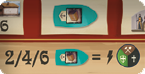
Choose 1 specific type of exotic goods (the
one you have the most of). For each shipment
you have of that type, score the indicated
number of points.
|
|
Score the indicated number of points for
each workshop you have, but if you have
more than 5 workshops, score only 5 of them.
|
|
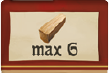
Score the indicated number of points for
each lumber token you have at the end of
the game, but if you have more than 6 lumber,
score only 6 of them.
|

|
Score the indicated number of points for each
cabin improvement you have. (No maximum
is specified, but you have only 4 cabins, so
you can’t have more than 4 improvements.)
|
|
Score the indicated number of points for
each coin you have at the end of the game,
but if you have more than 9, score only 9.
|
Note: If you are on the first level of the track, you score [½] point
per coin. If you have an odd number of coins, round the resulting
half-point down.
Register Priority Tile
|
This tile can be used even if you are not playing the advanced
variant. It modifies the round info table, altering which register
has priority in each round.
|
|
Solo Variant
Messina 1347 can also be played as a single-player game. It
works with or without the Advanced Variant boards. You will
play against one (virtual) opposing player who plays according
to the rules explained below.
Setup
|
Choose colors for yourself and the opponent.
Set up a 2-player game. The
opponent will not use the city and
church registers, so place only your
counters on those two registers.
Shuffle the deck of opposing-player
moves and keep it nearby.
Note: If you are using the b side of your
player board, you will need some spare
tokens to mark single-use squares on
your estate.
|
Lieutenants
Your opponent uses this many lieutenants:
Because your opponent’s lieutenants do not use the Messina
movement rules, you may return them to the opponent’s board
at the end of each round.
Play Order
You start as the first player in rounds I, III, and V. The opponent
goes first in rounds II, IV, and VI.
Opponent‘s Turns
The opponent’s turns are similar to yours.
-
CHOOSE A HEX. Reveal the top tile of the opponent’s
stack. Place an unused opposing lieutenant on the indicated
hex, if it is available. If the hex is not available, either
because you have already taken it or because it is not yet
in the game, keep drawing tiles until you find an available
hex and put the lieutenant on it. (Ignore the other, invalid
moves for the remainder of the round.)
-
RESCUE CITIZEN. Remove any citizen token from the hex
and return it to the supply.
-
FIGHT PLAGUE. If there are plague cubes on the hex, the
opposing player removes 1 of them and advances 1 space
on the popularity register.
-
PERFORM ACTION. The opposing player ignores the action
available on the hex. Instead it performs the action
shown on the bottom of the tile:

|
Take a boat tile from
the dock closest to the
chosen hex. If multiple
boats are closest, choose
one of them randomly.
|

|
Take the
available
wagon.
|
|
Take a workshop of
the indicated type.
|

|
Take all available
quarantine improvements.
|
Final Scoring
Score 5 points if you match or beat the opponent’s position on
the popularity register. Otherwise, score your points as usual.
|
Scoring of repopulated hexes in
solo game differs from the base
game. If a player repopulates
two hexes, he scores 3 points. For
repopulating 3 hexes, he scores
7 points and if he manages to
repopulate 4 hexes, he scores
10 points.
|
A good score is 130 points, or 140 points if you are playing with
the Advanced Variant.
Other Notes on Scoring (all player counts)
|
Scroll Board Example: Blue advanced
three times on the central
track of scroll board a. Each boat
tile he took is worth 4 points. For
example, if he has 4 boat tiles, he
scores 16 points.
|

|
If you go over 50 points during
final scoring, you can put one of
your lieutenant figures (or some
other token of your color) on this
space to remind you.
|
Game Setup Overview
Rules Reminders
-
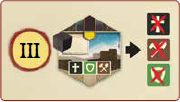
During setup, Messina is constructed from all the A hexes that match the
number of players and 1 randomly selected B hex.
-
There is a limit to how many plague cubes can be in Messina, as shown in the
illustration above. Leave the rest in the box.
-
If you do not have enough plague cubes to go into every space selected by the
population wheel, do not put out any plague cubes at all.
-
You can use a lieutenant from your estate only if all of your lieutenants in
Messina have already been used.
-
A lieutenant at a dock does not block other lieutenants from using that dock.
-
On your turn, each plague cube on your chosen hex will give you 1 rat token
unless you manage to remove the cube when you fight plague.
-
A major fire token allows you to remove an additional plague cube on an
adjacent hex.
-
Early-game workshops produce at the end of each round. Late-game workshops
have an immediate reward instead.
-
An upgraded citizen in a workshop will produce 1 point at the end of the
round regardless of whether it is an early-game or late-game workshop.
-
In rounds V and VI, the scoreboard should have the late-game workshops on it.
-
If a neighborhood requires a lieutenant to repopulate it, you give up a lieutenant
that has not been used this round (and not the one who chose that
neighborhood hex). It is returned to the box, but it continues to count as
“your lieutenant” when you pay to advance on the city or church register.
-
The cost to advance on the city or church register is 1 coin per lieutenant;
count the 3 you start with plus any you have taken from the supply.
-
If a plague cube is placed on a hex you repopulated, you gain 1 rat token.
-
When a lieutenant chooses a hex you repopulated, you gain 2 points.
|
Adding Hex Example:
The docking tile adds
a new boat at the lower left dock. The new hex
goes in closest empty space clockwise.
|
Game Icons
-
You can activate the color blind help in the game options.
-
The game settings allow you to change the layout:
-
In the "Grid Layout" (default) all ui elements are visible at the same time, i.e. everthing is visible on one screen. This layout is suitable for a large screen.
-
In the "One Column Layout" the ui elements are displayed one below the other, which means you need to scroll. This layout is suitable for a small screen.
-
The game settings allow you to change the dynamic adjustment of the playerinfo frame size. The options are:
-
Automatic size adjustment (default). This helps to always display the ui elements as large as possible.
-
Fixed size. Advantage: You don't need to adjust the size of the ui areas during the game, e.g. after a player aquired his first workshop tile. If you have a very large screen then you might prefer this mode.
-
Improve contrast: In order to better concentrate on the relevant parts, the background image of the Messina tiles is shaded by default. However the game settings allow you to change this so that the original hex tiles are displayed (i.e. unshaded), if you prefer this.
-
Animations can be disabled via the game settings.
| |